High Pass Sharpening in Photoshop

You might be familiar with some of the standard sharpening methods that Photoshop offers, including Sharpen, Sharpen More, and Unsharp Mask. But have you ever stopped to consider whether these sharpening filters are the best way to give you crisp, clean looking images?
The truth is, there is a better way, and it's called high pass sharpening.
High pass sharpening is what the pros use to make their photos really pop. High pass sharpening in Photoshop allows you to sharpen the most important areas of your photographs without effecting the rest of your image.
What Is High Pass Sharpening
High pass sharpening uses a duplicate layer of your original image, and allows you to adjust the local contrast in your image between light and dark areas, while giving you control over the strength and spread of the effect. Increasing the local contrast between light and dark areas gives your image a sharper look.
It might sound confusing, but it only takes a few steps. After you try it once, you will never forget how to do it again.
Step 1
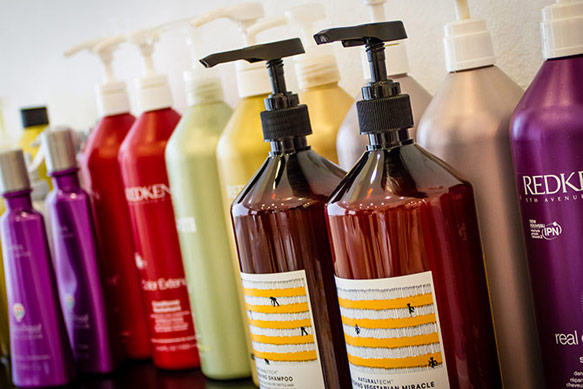
Open an image in Photoshop. Our image isn't necessarily blurry, but it could still benefit from a slight boost in perceived sharpness.
Step 2
Duplicate your background layer and set the Blend Mode of your new layer to Overlay. Setting our Blend Mode to overlay will allow us to preview the final effect as we make our adjustments in the High Pass dialog box.
It doesn't look very good...yet.
Step 3
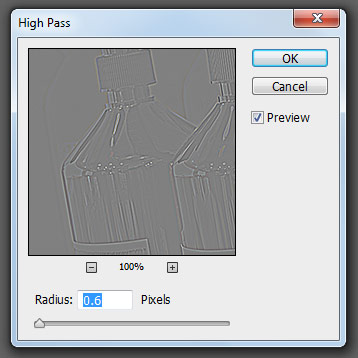
With your duplicate layer still selected, click Filter > Other > High Pass.
Since our High Pass layer is set to Overlay, the medium gray areas have no effect on our overall image, while the darker and lighter areas increase the contrast in those areas.
By adjusting the Radius of our High Pass layer so that only certain edges are visible, we can increase the overall clarity of our image while leaving less important areas unaffected.
As you adjust the Radius, check the Preview box to see the final effect before hitting OK.
You can also achieve a faux-HDR effect by using higher Radius values, but be careful not to overdo it.
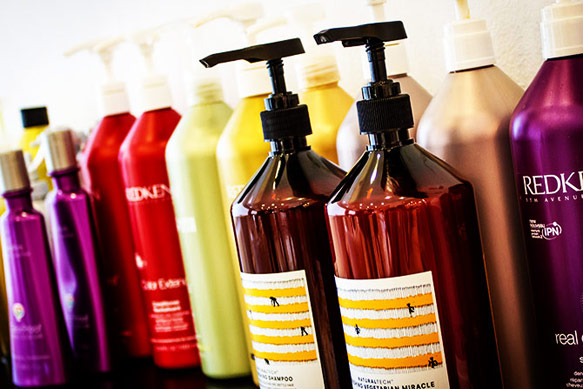
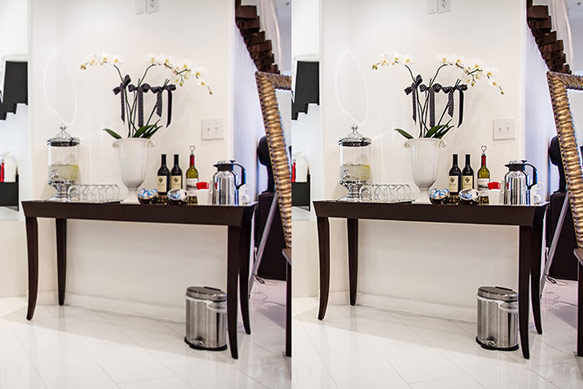
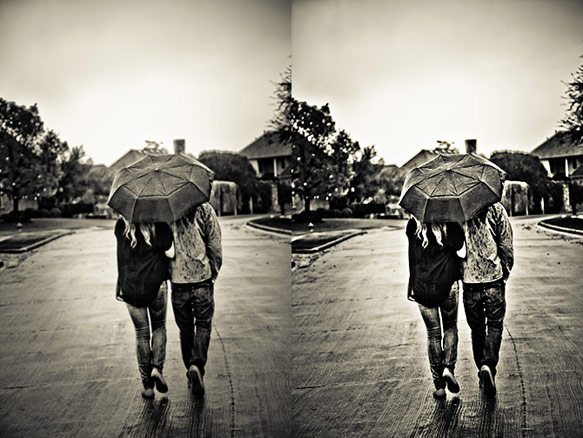
Sample Images
Below are before and after samples of the high pass sharpening technique done in Photoshop.
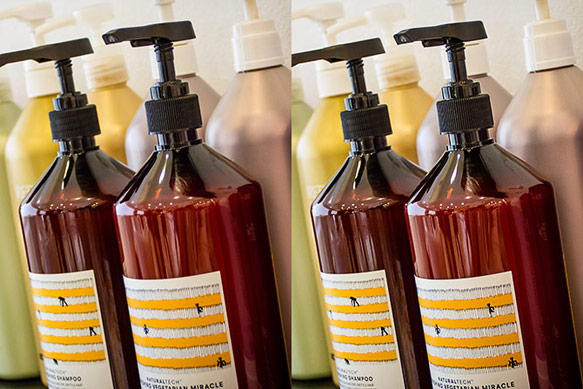
The image below is an example of the faux-HDR effect that can be achieved using high pass sharpening.
Have you used high-pass sharpening before? Do you think it's a better way to sharpen your photos? Let us know in the comments or on Facebook.