How to Change a Person's Skin Color from Dark to Light in Photoshop

Watch Video Tutorial
Download full HD videos and tutorial project files with a PanoPass. You'll also get instant access to everything on the site, including products, and more.
Working with skin tones in Photoshop takes a lot of practice. One of the most commonly requested tutorials is changing someone's skin from dark to light, or vice versa.
This tutorial will teach you how to realistically change dark skin to light skin using layer masks and adjustment layers in Photoshop.
There are a few reasons why we're using this image for our tutorial:
- It's in the public domain. That means it's free to use for any purpose.
- It's a high quality, high resolution photo. The better the source document, the better your outcome.
- It's fun to mess with photos of famous people.
Step 1
Open your image in Photoshop, and press CTRL + J to duplicate it onto another layer.
First, you want to make a selection of all the skin in your image. The video version of this tutorial uses the Color Range tool, but the written version will show you how to use the Quick Selection tool.
Select the Quick Selection tool. Click and drag on the face in your image to select all the skin.
Hold ALT and click and drag to remove any extraneous areas from your selection like the hair, eyebrows, and eyes. You'll need to resize your Quick Selection brush using the [ and ] keys, and add/subtract areas from your selection until you have only the skin selected.

Step 2
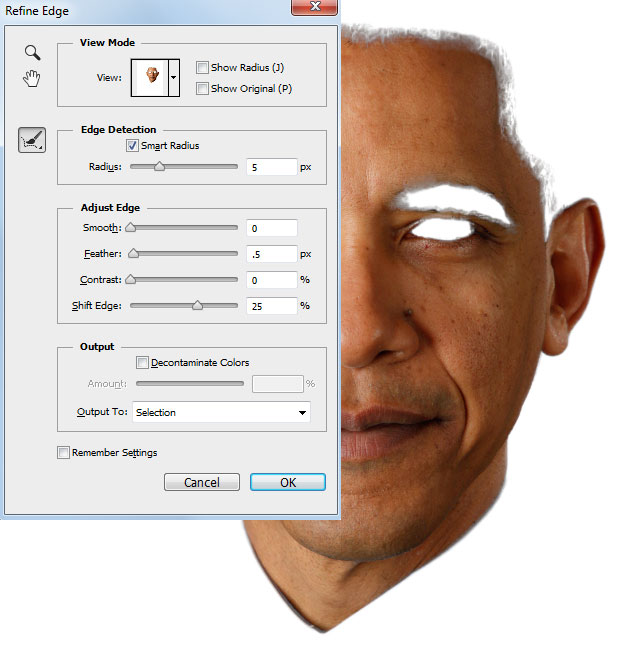
Right click your canvas and choose Refine Edge.
Turn on Smart Radius and set the Radius to about 5 pixels. With the Refine Edge dialog still open, paint along the hairline where the skin color and hair color fade into eachother. This will feather your selection to make it look more natural.
Set the Feather amount to 0.5 pixels and the Shift Edge amount to 25%.
Step 3
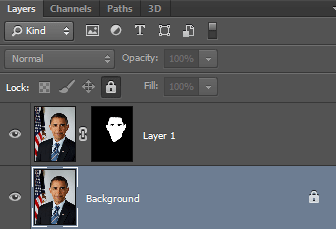
Press the Add Layer Mask button at the bottom of the Layers panel to create a mask using the selection we just made.
Step 4
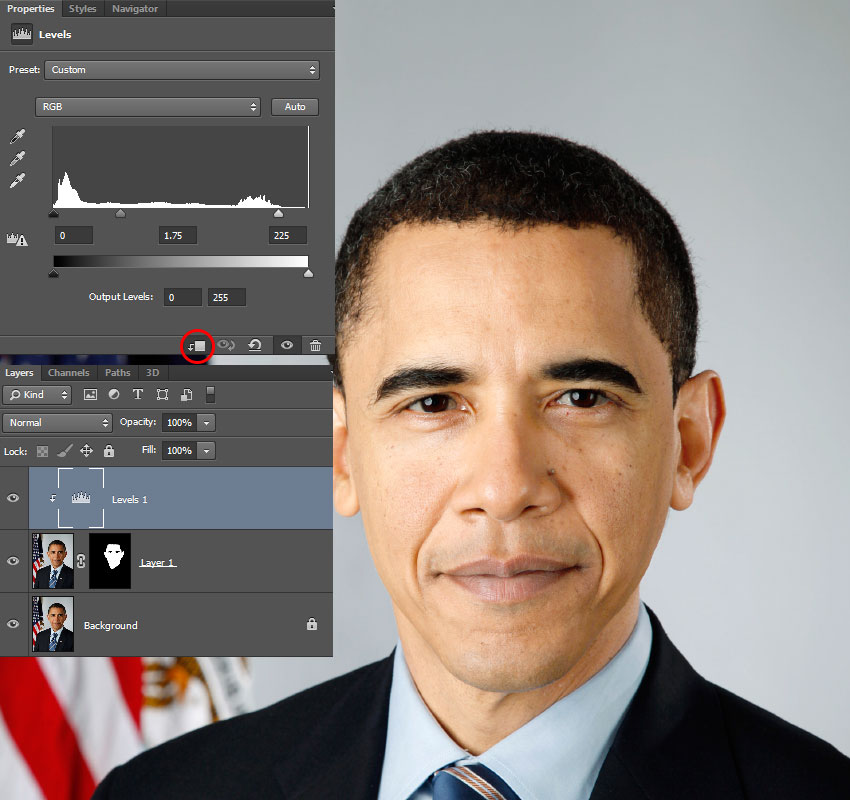
Create a new Levels Adjustment Layer. Click the Create Clipping Mask icon in the Properties panel to clip our changes to the skin mask layer.
Set the middle stop to 1.75 and the white stop to 225 to brighten the overall tone of the skin.
Step 5
Create a Curves Adjustment Layer and give it a Clipping Mask as well.
Adjust the curve to darken the highlights. The first point values are Input: 180 and Output: 165. The second point values are Input: 200 and Output: 205.

Step 6
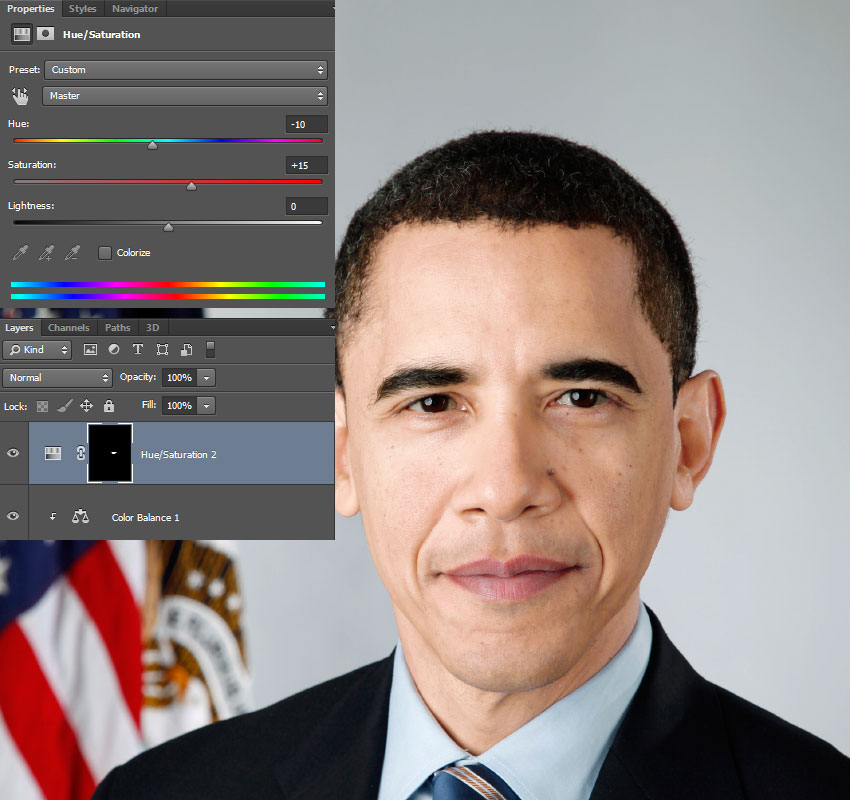
Add a Hue/Saturation Adjustment Layer and give it a Clipping Mask. Take the Saturation down to -10.

Step 7
Create a Black & White Adjustment Layer and give it a Clipping Mask. We'll make a couple small adjustments to the default settings.
Set the Red amount to 55 and the Yellow amount to 220.

Step 8
Set the Blend Mode of the Black & White Adjustment Layer to Luminosity and the Opacity to 35% in the Layers panel.

Step 9
Create a Color Balance Adjustment Layer and give it a Clipping Mask. For the Midtones, set the Red value to +8 and the Magenta to -7.
Make sure Preserve Luminosity is checked.

Step 10
Create a Hue/Saturation Adjustment Layer, but this time do NOT give it a Clipping Mask.
Set the Hue to -10 and the Saturation to 15.
Give it a Layer Mask if it doesn't have one already and fill it with black. Using a soft brush, paint white on the Layer Mask just over the lips.
Step 11
Create a Curves Adjustment Layer. Add a point and drag it up and to the left to brighten the image until you can see the color and details within the eyes.
Give it a Layer Mask and fill it with black. Using a white brush, paint on just the irises of the eyes.

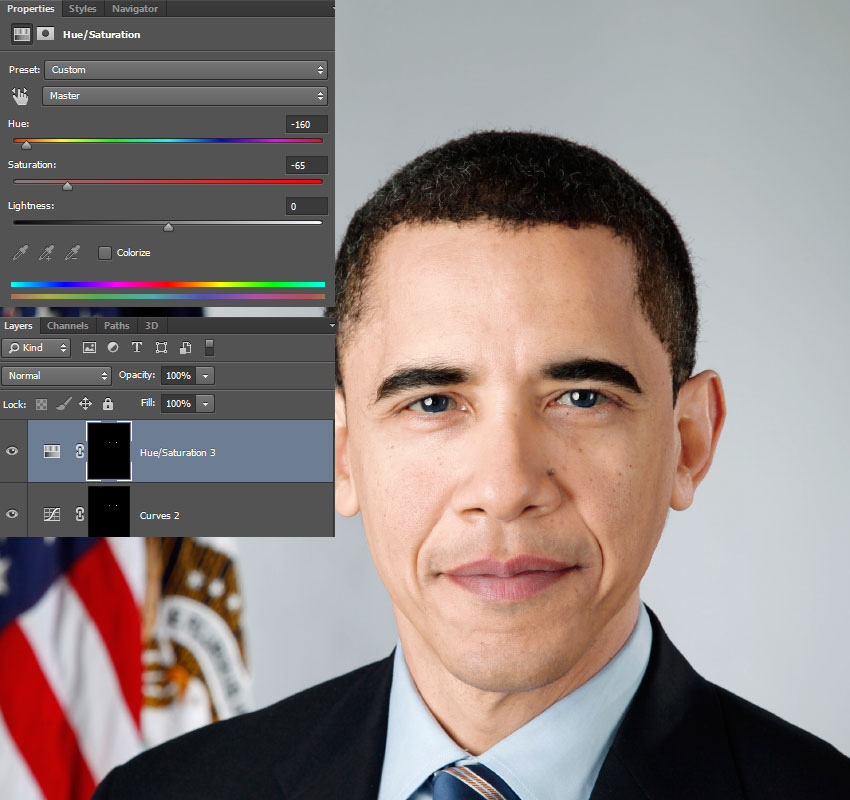
Step 12
Create a Hue/Saturation Adjustment Layer. Set the Hue to -160 and the Saturation to -65.
ALT + click and drag the Layer Mask icon for the irises from the previous layer onto the new layer to make a copy of the Layer Mask.
Step 13
Select the background layer in the Layers panel and using the Quick Selection tool, click and drag to make a selection of the hair and eyebrows.
Right click your selection and choose Refine Edge. Use the same technique as we did in Step 2 to soften your selection.
Create a Curves Adjustment Layer, which will automatically use your selection as a Layer Mask. Adjust the curve to brighten the hair until it better matches the skin.

Final Image
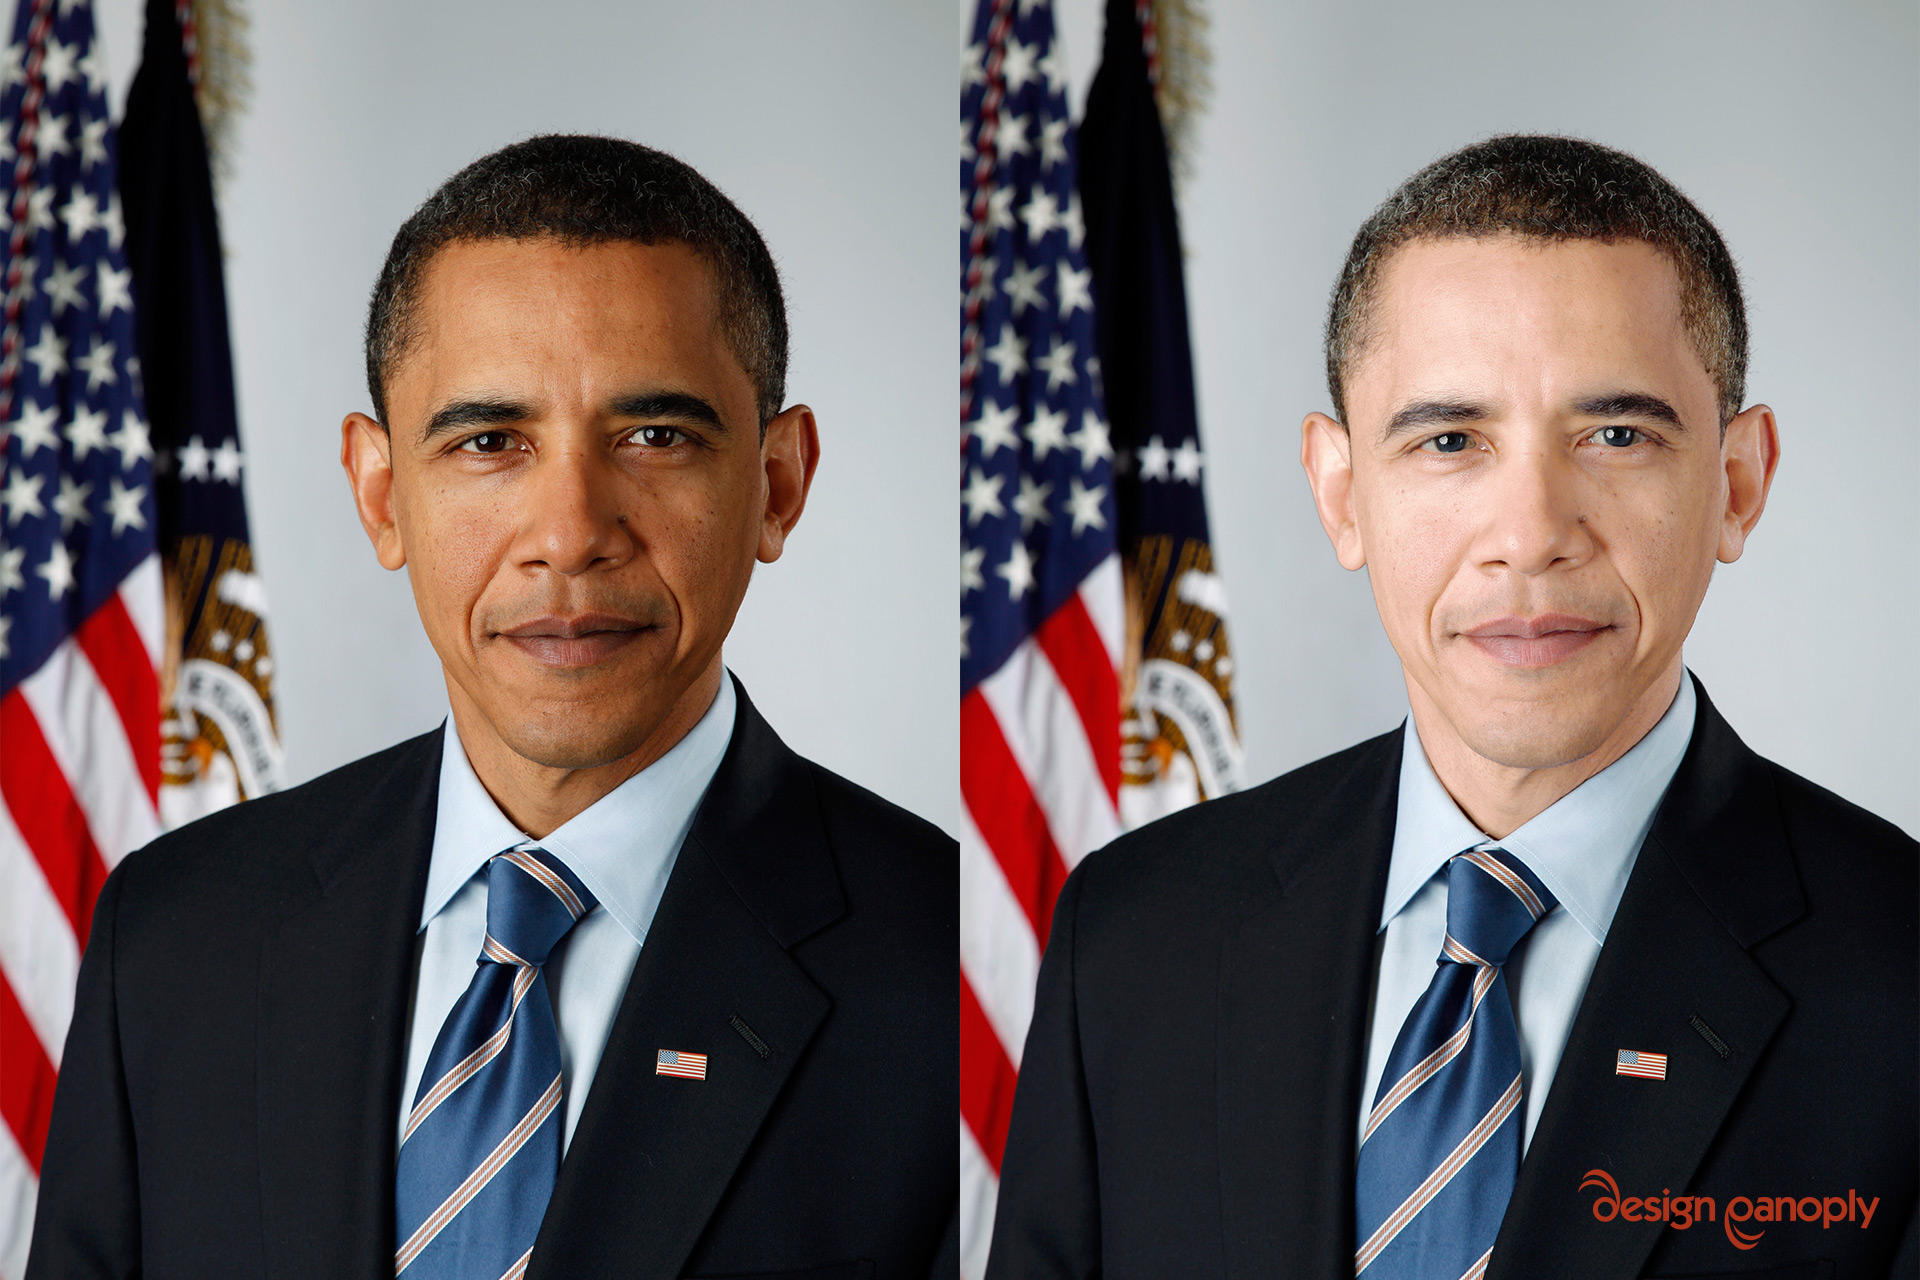
Changing skin from dark to light is easier to do than light to dark when you're going for a dramatic look, but you can use similar methods to try things the other way around.
Were you able to use these techniques on a photo of your own? Share your version in the comments.