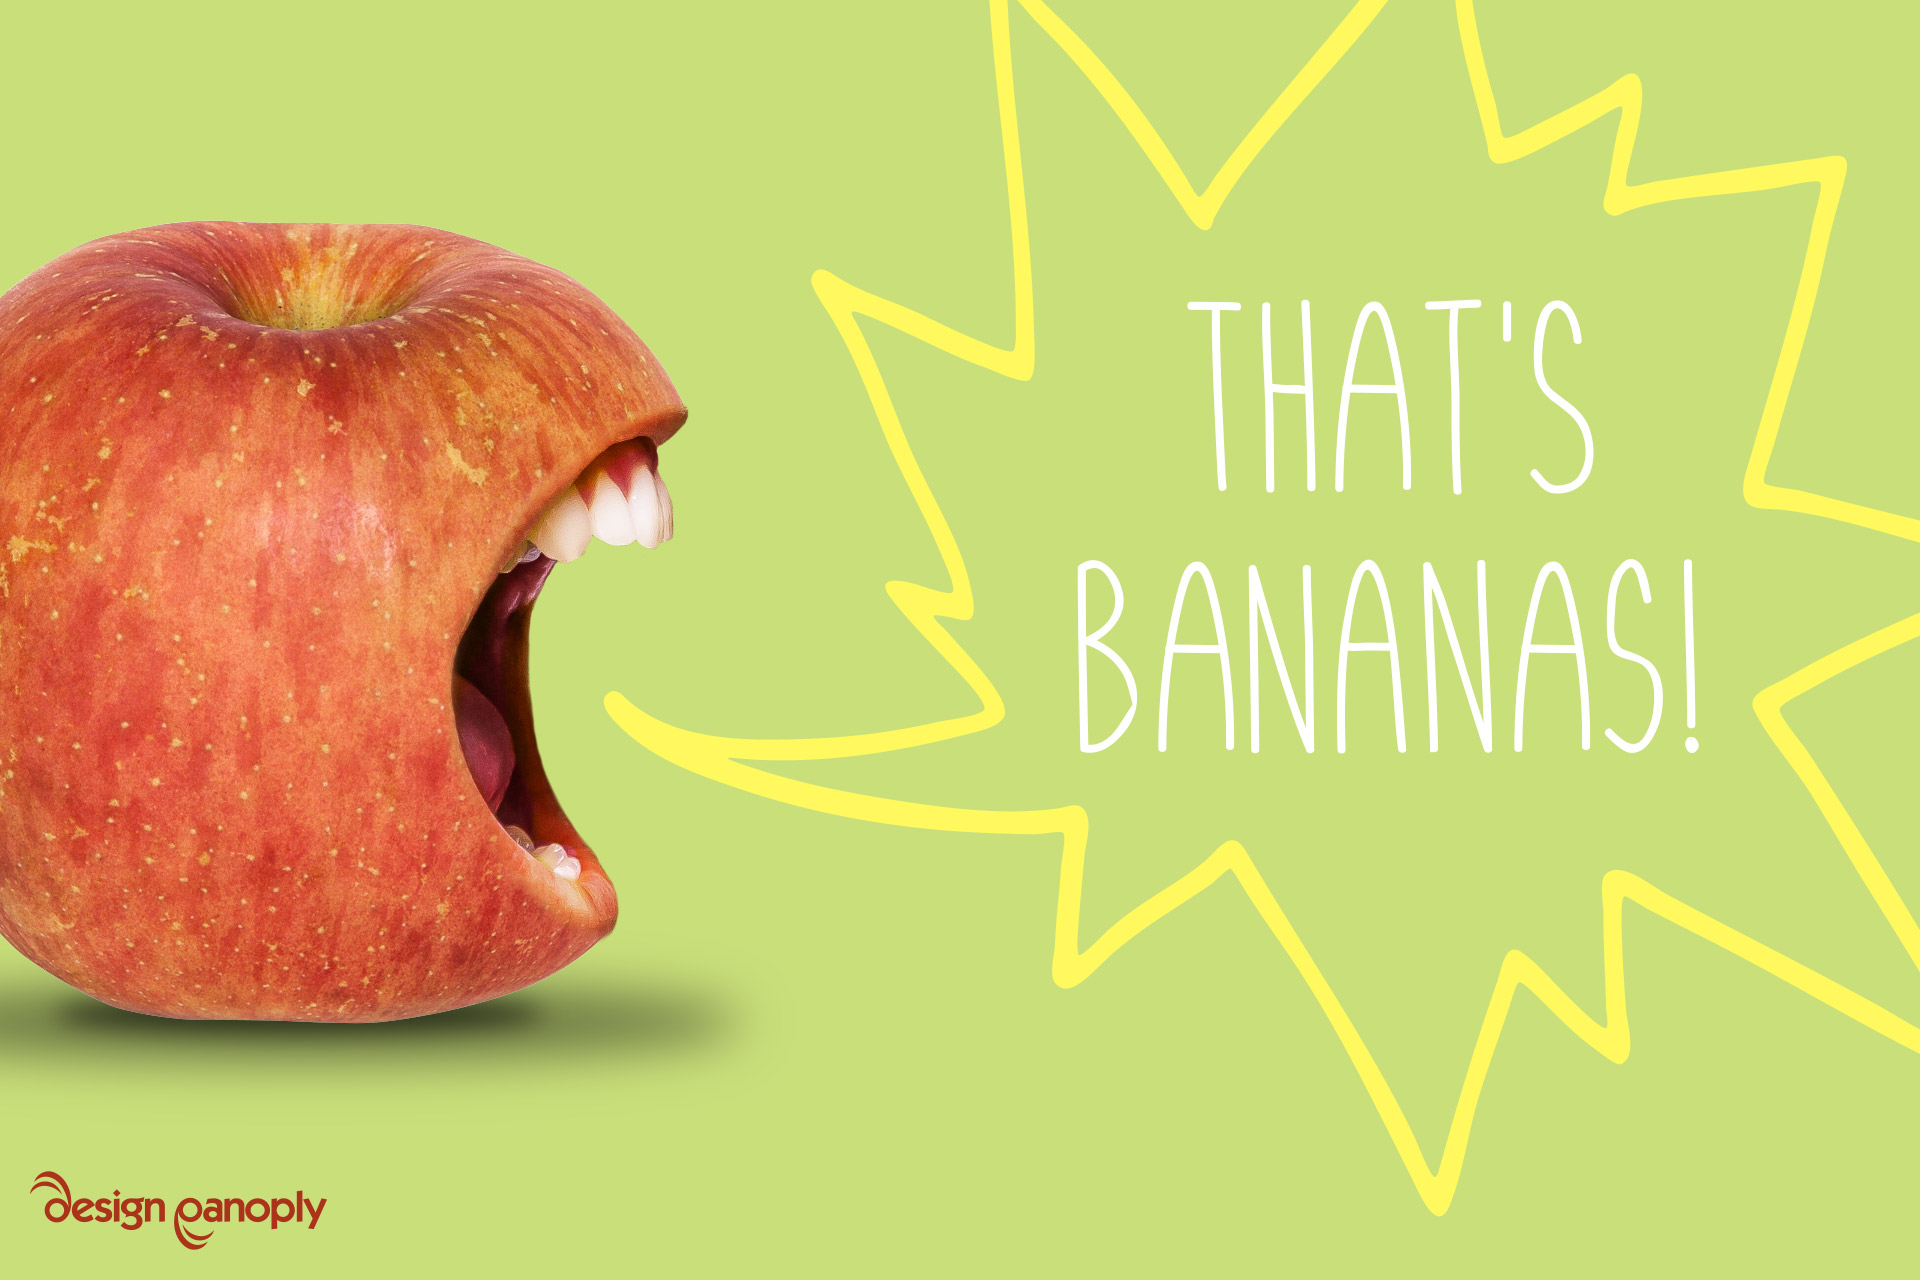
How to Create a Loud Mouth Apple in Photoshop

Watch Video Tutorial
Download full HD videos and tutorial project files with a PanoPass. You'll also get instant access to everything on the site, including products, and more.
Anthropomorphism, or giving human characteristics to a non-human object, is a great way to grab someone's attention. Not to mention that it's just fun to create some really funky stuff.
This tutorial will teach you how to seamlessly combine a human face with another image to create one bad apple.
Step 1
Create a new document and give it a green background. We're using the color #C9DF7A.
You need to have your apple photo already cut out from its background.
Drag your apple image into the canvas, and convert it to a Smart Object if it isn't already.

Step 2
Drag your face photo into the canvas and convert it to a Smart Object if it isn't already.
Set the face photo opacity to 50% in the Layers panel, and resize it until the open mouth matches up with the size of the side of the apple.

Step 3
Set the face layer opacity back to 100%.
Use the Quick Selection tool, and click and drag on the mouth and teeth to make a selection. Hold ALT + click and drag to remove extra areas from your selection. The more you go back and forth between adding and subtracting from your selection, the more precise the Quick Selection tool becomes.

Step 4
Right click your canvas and choose Refine Edge.
Set Radius to 3px, Smooth to 100, Feather to 1px, and Contrast to 50%. This will smooth the selection and clean up any hard edges.

Step 5
Click Layer > Layer Mask > Reveal Selection to create a new Layer Mask from your selection.

Step 6
Select the apple layer in the Layers panel, and click Layer > Layer Mask > Reveal All to give it a Layer Mask.
Using black, paint on the area in front of the mouth to hide part of the apple layer.

Step 7
Select the mouth Layer Mask, and using a soft brush, paint the edges of the mouth with to blend it together with the apple.
You may need to alternate between painting with black and white to get a good blend.

Step 8
Add a Hue/Saturation Adjustment Layer above the mouth layer and give it a Clipping Mask so it only effects the mouth layer.
Set Hue to 20, Saturation to 40, and Lightness to -15.

Step 9
Give your Hue/Saturation Adjustment Layer a Layer Mask if it doesn't already have one. Using a black brush, paint on the teeth so the color adjustments only affect the lips.

Step 10
Add a Brightness/Contrast Adjustment Layer above the Hue/Saturation Adjustment Layer and give it a Clipping Mask so it affects only the mouth layer.
Set Brightness to 35 and Contrast to 10 to match the apple a bit better.

Final Image
You can now group all of your layers into a Smart Object and add additional elements or move them into other documents.
What's cool about this technique is that you can use the same steps to combine all kinds of different items, like a horse mouth with a pineapple for example.
What did you create? Show us in the comments.