How to Create a Wet Frosted Glass Effect in Photoshop

Watch Video Tutorial
Download full HD videos and tutorial project files with a PanoPass. You'll also get instant access to everything on the site, including products, and more.
The default Photoshop plugins and resources are capable of a lot more than you might think.
This tutorial will teach you how to use filters, layer styles, and adjustment layers to create a wet frosted glass effect in Photoshop.
By adjusting the layer styles, you can also use these steps to create other types of liquid like blood, oil, mud, and more.
Step 1
Create a new document, ours is 1,920 x 1,080. Drag a photo into your document and place it as a Smart Object.
Step 2
Click Filter > Blur > Gaussian Blur and set the Amount to 75 pixels.

Step 3
Double click your Smart Object in the Layers panel to open the Layer Style dialog. Apply the following Layer Style settings to give it a frosted look.
Use the color #0095FF for the Color Overlay.
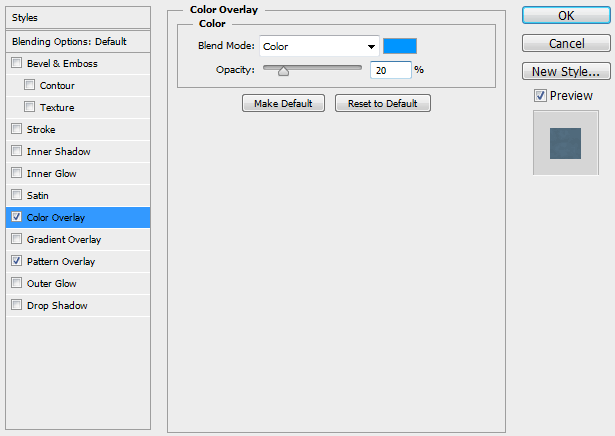
The Pattern we're using is one of the Photoshop defaults. Load the "Erodible Textures" pattern set, and select the first pattern, which is named "Rough".

Step 4
Create a new layer and fill it with black using the Paint Bucket tool (G). Click Filter > Noise > Add Noise.
Set the Amount to 100, the Distribution to Gaussian, and make sure Monochromatic is checked.

Step 5
Click Filter > Blur > Gaussian Blur and set the amount to 10 pixels. If you want smaller drops, decrease the blur amount. For bigger drops, increase the blur amount.

Step 6
Add a Threshold Adjustment Layer and set the Threshold Level to around 85.

Step 7
Select the Magic Wand tool (W). Make sure that "Contiguous" is unchecked in the top toolbar.
Click one of the white spots to select them all. Click Select > Refine Edge (CTRL + ALT + R), and set Smooth to 65.

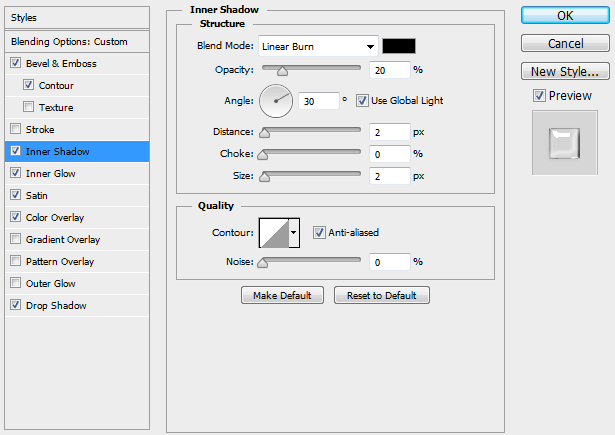
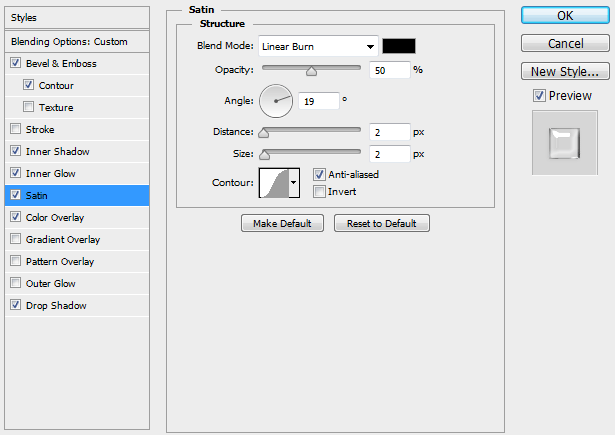
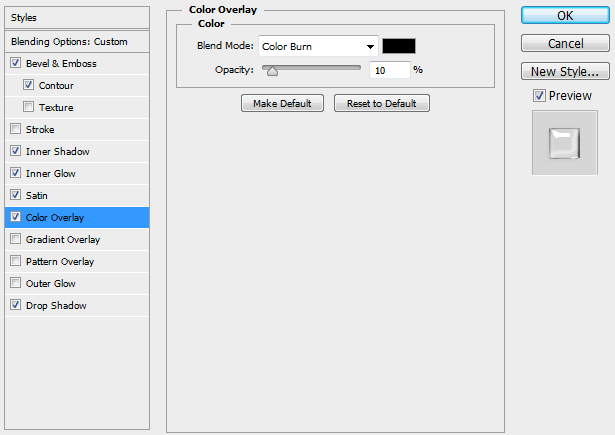
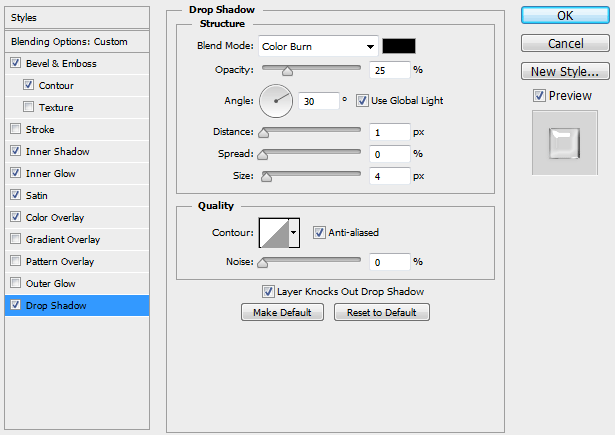
Step 8
Click Layer > New Fill Layer > Solid Color to create a black Solid Color fill layer using your selection as a Layer Mask.
Set the fill to 0% in the Layers panel, and hide your original two layers, showing your background again.
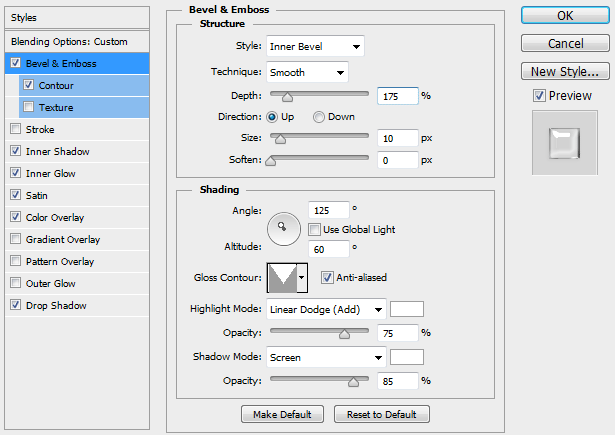
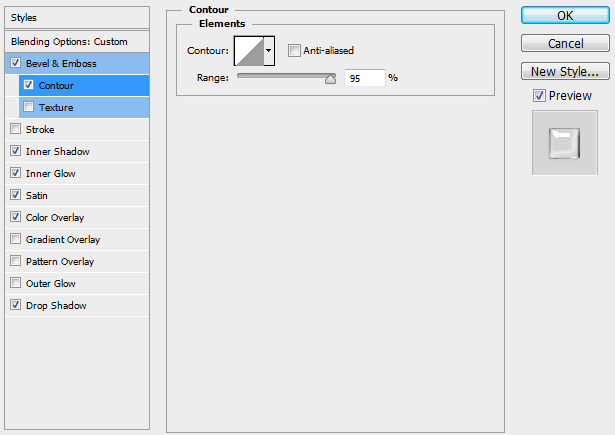
Apply the following Layer Style settings.


Step 9
Duplicate your background layer and move it to the top of the Layers panel. Set the Blend Mode to Color Dodge and the Fill to 30% in the Layers panel to increase the intensity and contrast a bit.

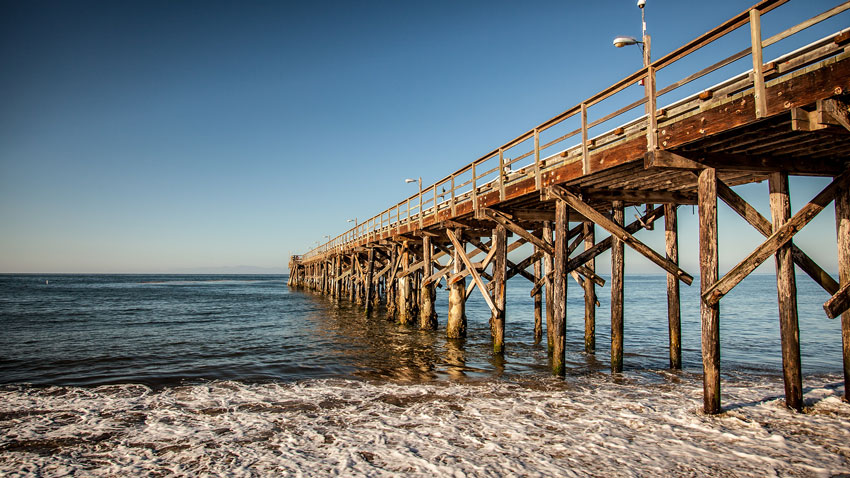
Final Image
That's it. You can always repeat certain steps if you want to change the size of your water drops, or change the Blur amount to make your image more visible.

Were you able to create a wet, frosted glass effect on your own images? Share your version in the comments.
Related Items
Grab a PanoPass now and get instant access to all these items and much more.
