How to Create an Editable 3D Text Effect in Photoshop

Watch Video Tutorial
Download full HD videos and tutorial project files with a PanoPass. You'll also get instant access to everything on the site, including products, and more.
There seems to be an infinite amount of effects you can create in Photoshop. Once you have a few of them up your sleeve, it makes creating useful graphics that much easier.
This tutorial will teach you how to create some cool, editable 3D text in Photoshop. This effect is not limited to just text, and can be used with vector shapes as well.
Step 1
We're starting off with a custom background that is 1,920 x 1,080 pixels. If you're a PanoPass member, you can download the source files to grab it, otherwise, you can use any background you choose.
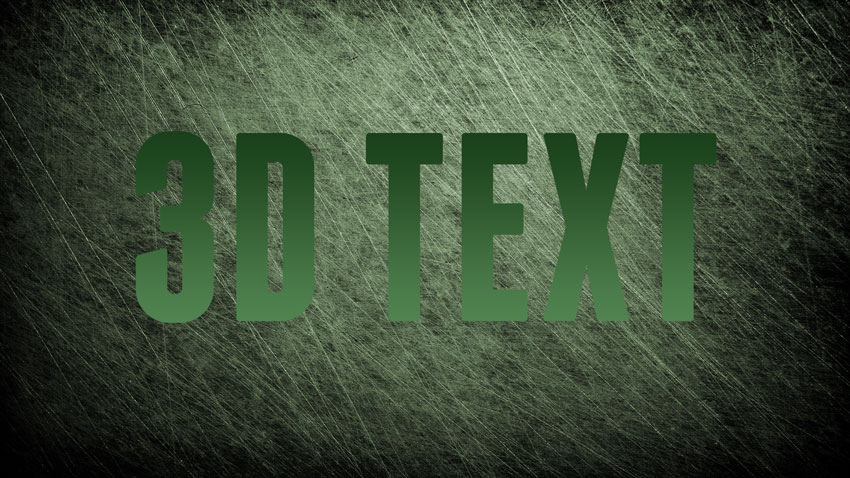
First, create a big block of text. Thick, sans-serif fonts typically work best for things like this.
Step 2
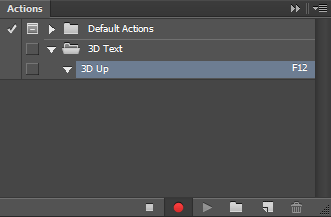
Open the Actions panel. Create a new action set by clicking the folder icon at the bottom of the Actions panel and name it "3D Text".
Then click the Create New Action button at the bottom of the Actions panel to create a new action named "3D Up". Make sure to set the Function Key to F12 and then hit Record.
Step 3
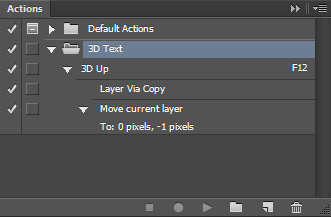
While the action is recording, press CTRL + J to duplicate your text layer. Then press the Up arrow to nudge your new layer up 1 pixel.
Press the Stop button in the Actions panel to stop recording. Hide the Actions panel so it's out of the way.
Step 4
Delete the duplicate text layer you made when you created the action.
Right click your text layer and convert it to a Smart Object.
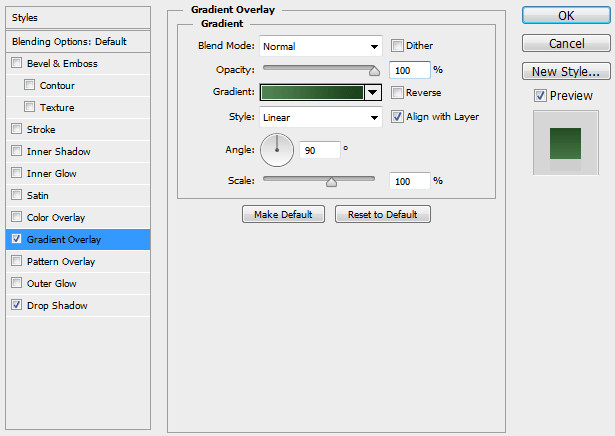
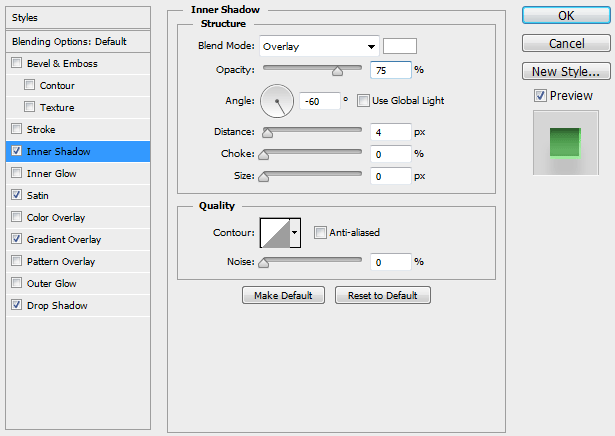
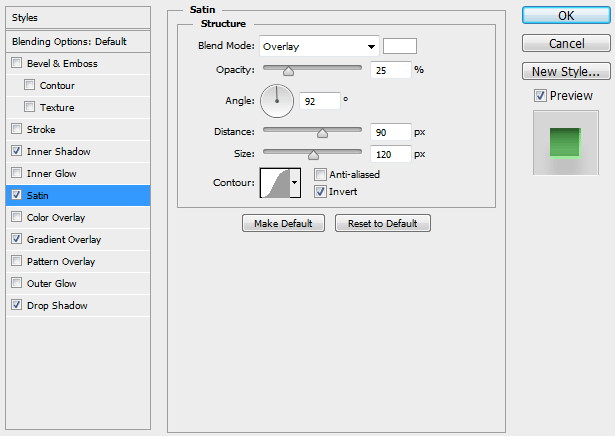
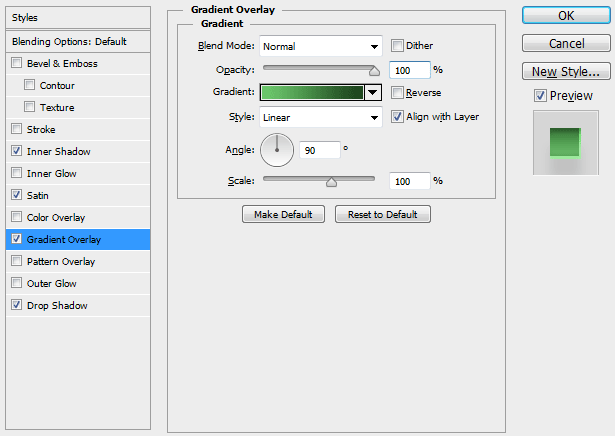
Double click your Smart Object in the Layers panel to open the Layer Style dialog and add the following layer styles.
The colors used in the Gradient Overlay are #518351 and #1A401A.

Step 5
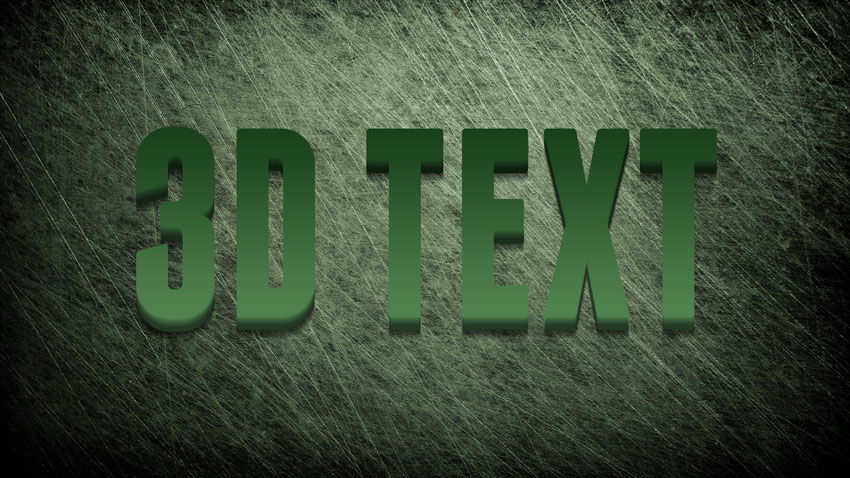
Press F12 approximately 30 times to run the action we previously created to create a stack of text layers in the Layers panel.
Step 6
Right click the very top layer in the Layers panel and select Clear Layer Style. Then double click it to open the Layer Style dialog so we can add some new styles.
Apply the following layer style settings. This time, our Gradient Overlay will use the colors #6DC96D and #1B421B.

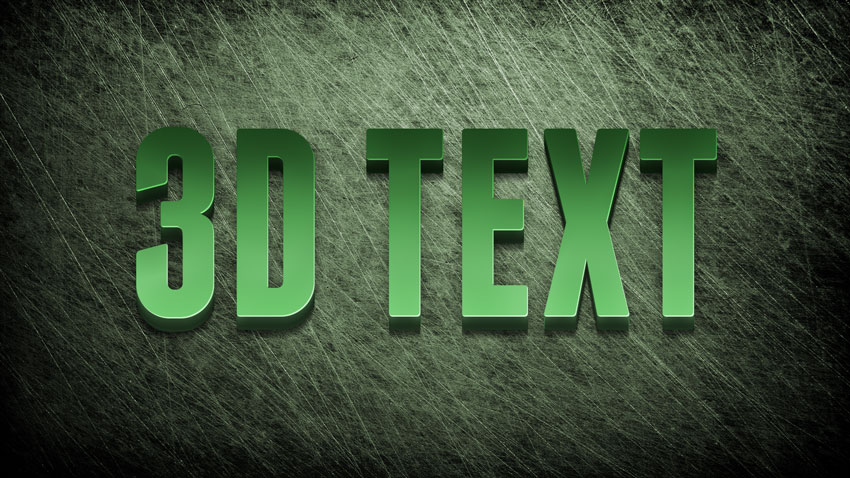
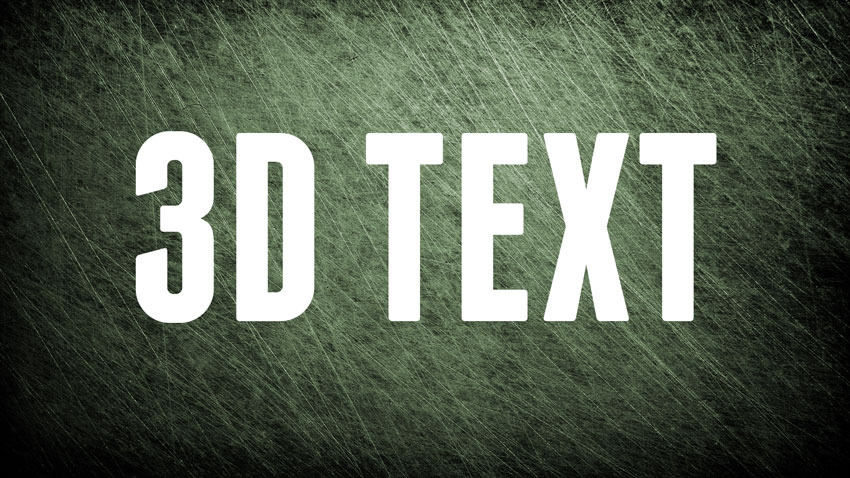
Final Image
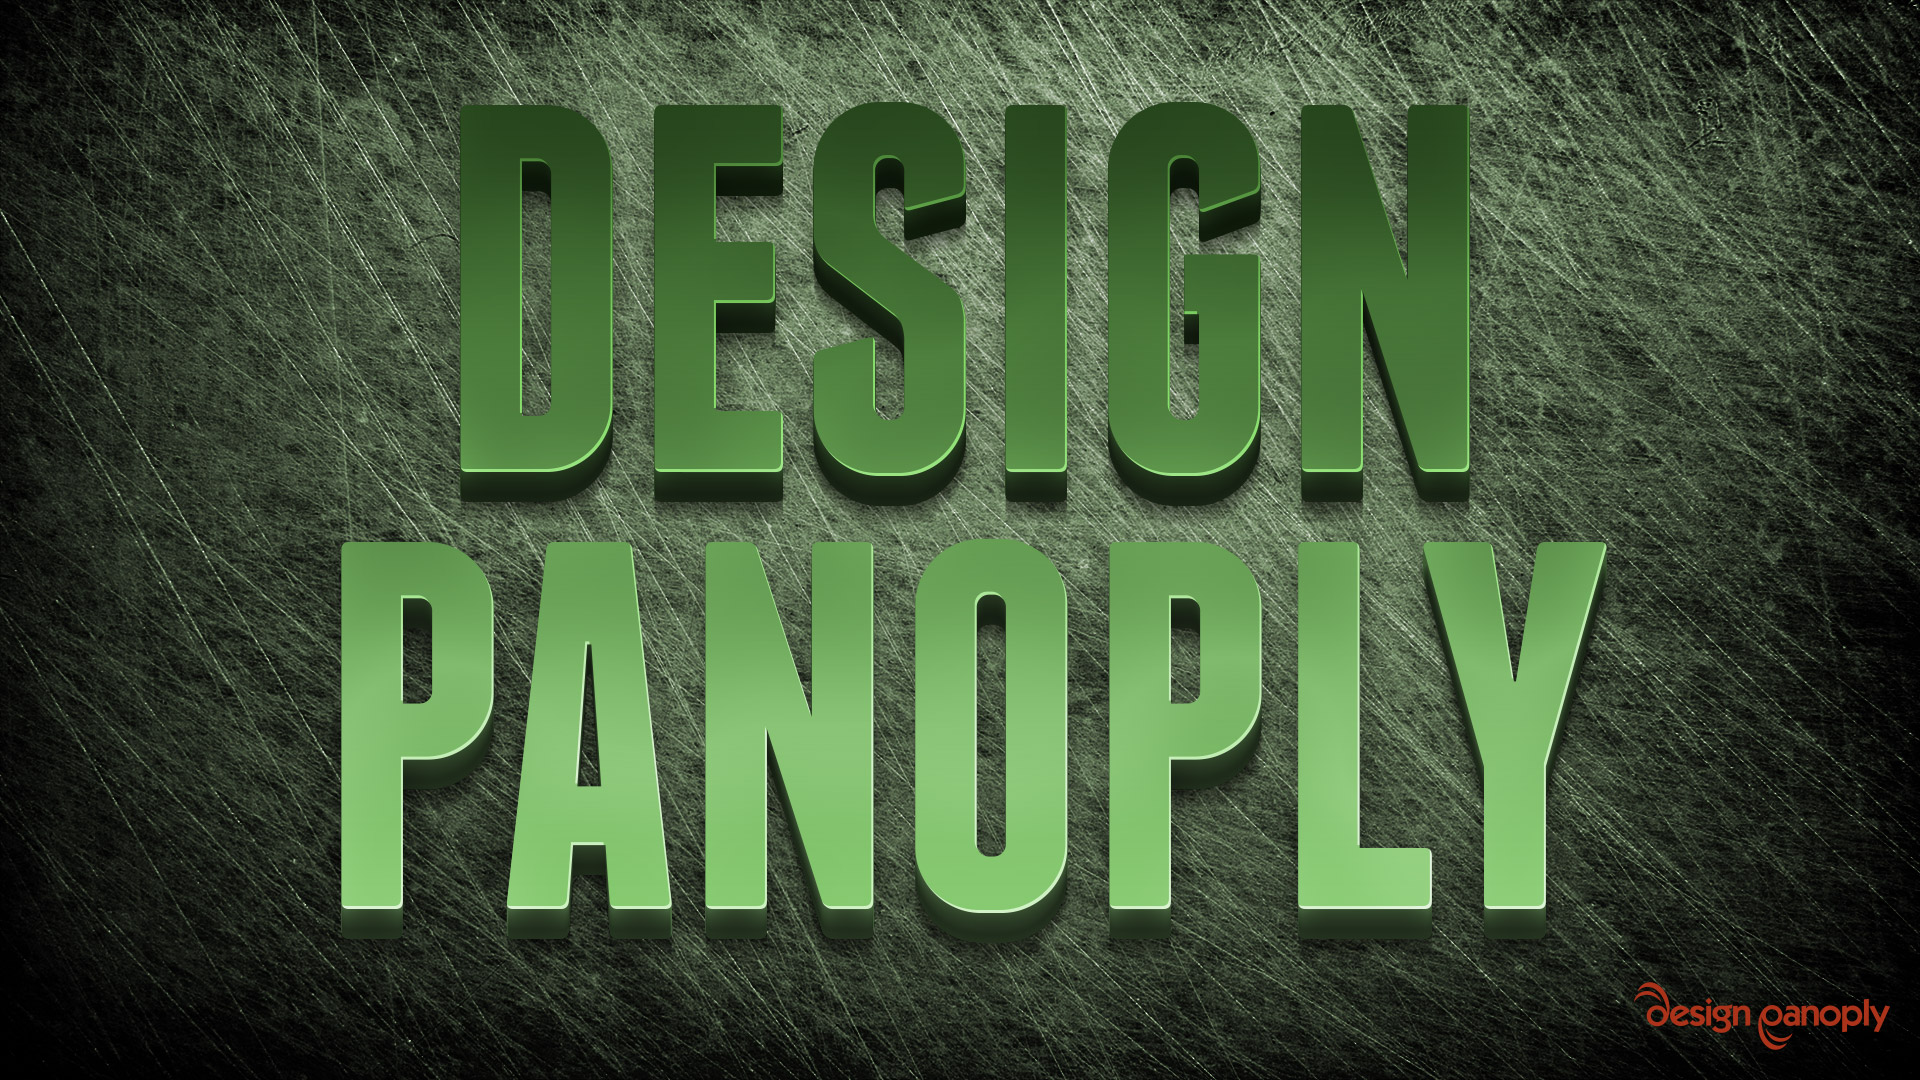
Since we converted out text to a Smart Object in the beginning, it can be easily changed by double clicking the Smart Object thumbnail in the Layers panel. You can even use shapes instead of text.
Were you able to create your own editable 3D text effect? Share your version in the comments.