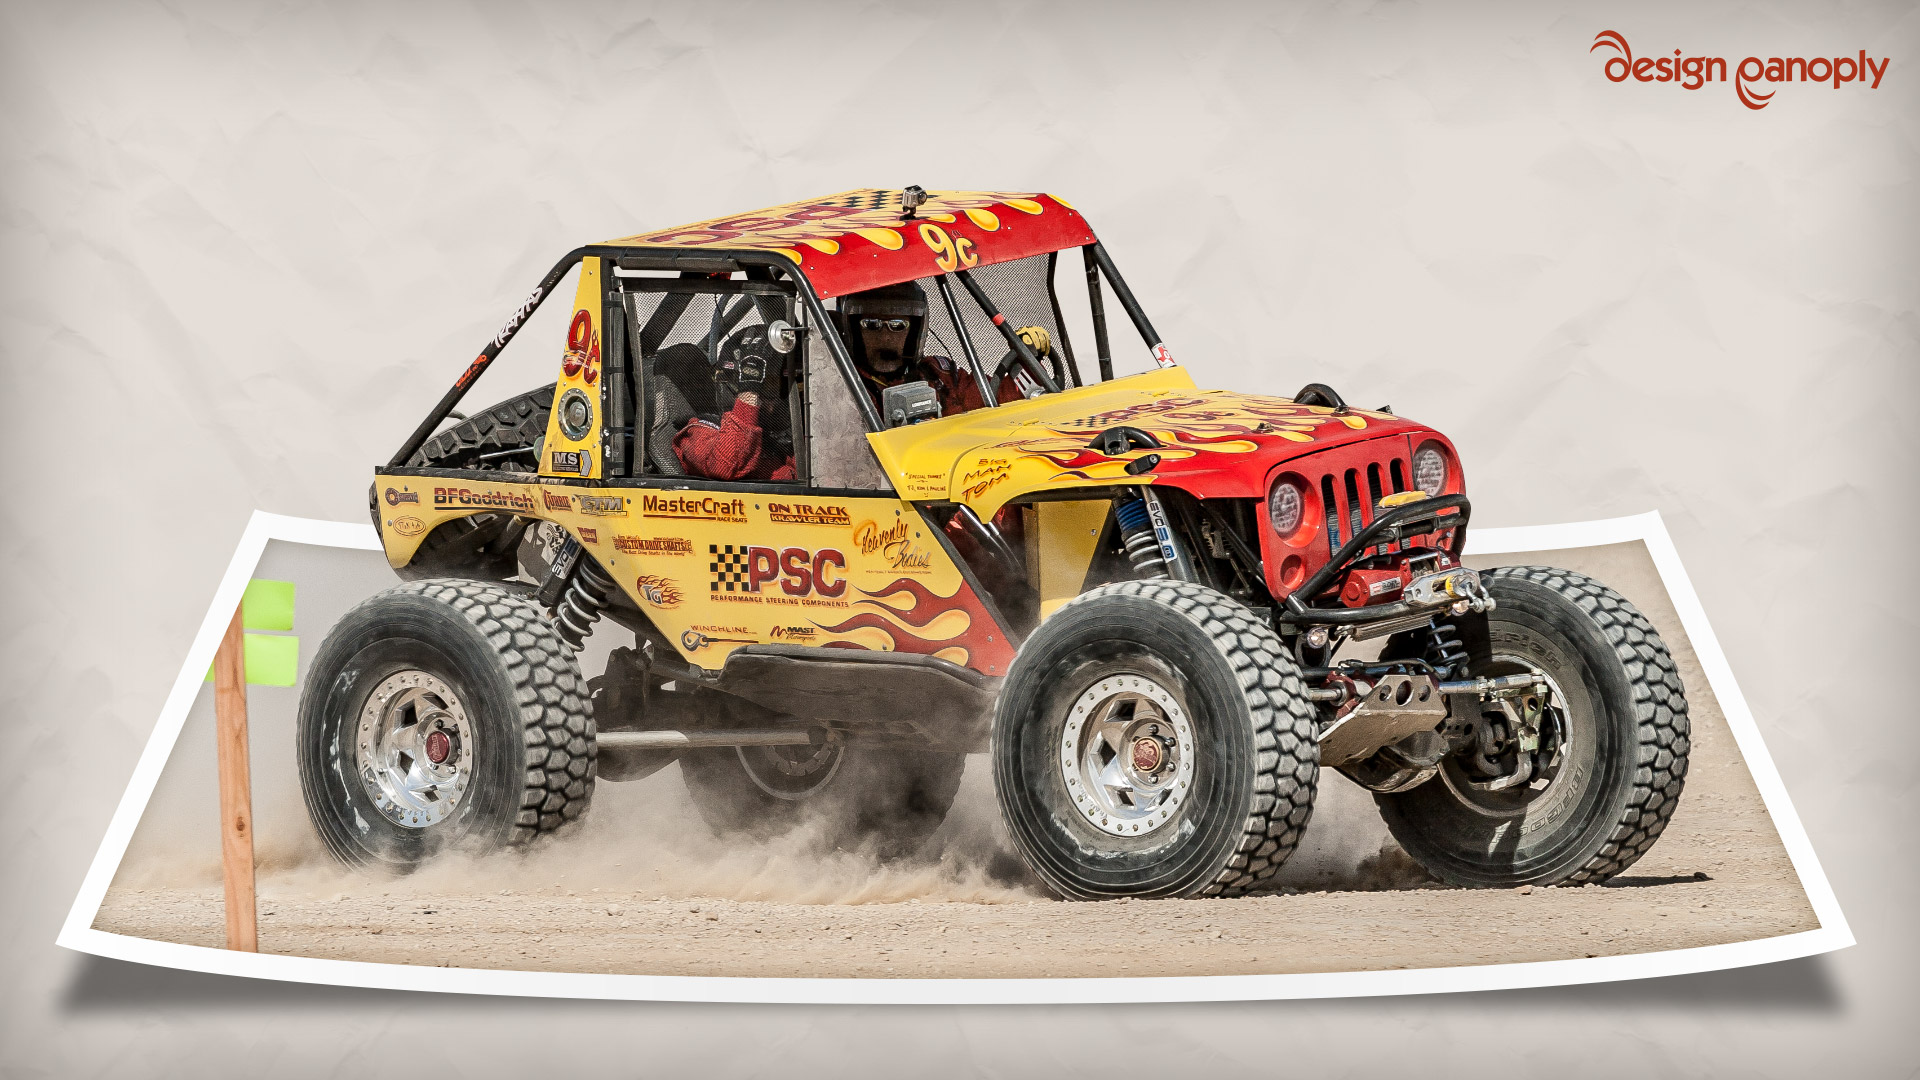
How to Create an Out of Bounds, Pop Up Photo Effect in Photoshop

Watch Video Tutorial
Download full HD videos and tutorial project files with a PanoPass. You'll also get instant access to everything on the site, including products, and more.
Whenever you're forced to use a sub par photo, or just want to take your image one step further, there are a lot of options to choose from.
One simple — but not so easy to execute — technique is called the out of bounds photo effect. That's just a fancy way of saying that certain parts of your image stick out past the usual rectangle shape.
This tutorial will teach you a pseudo 3D take on this popular process.
Step 1
Open up a flattened image in Photoshop and press CTRL + J to duplicate the background layer.
Click Layer > Vector Mask > Reveal All.
Select the Rectangle tool and make sure that the mode is set to Path in the top toolbar.
Select the Vector Mask you just created, then draw a rectangle on your canvas.
Hide the original background layer and you should have an image that looks like below.

Step 2
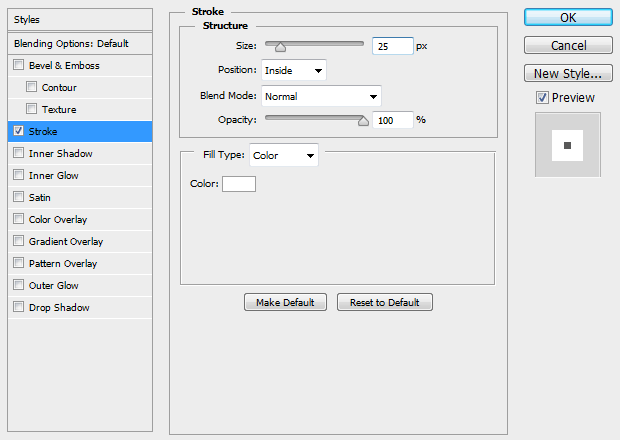
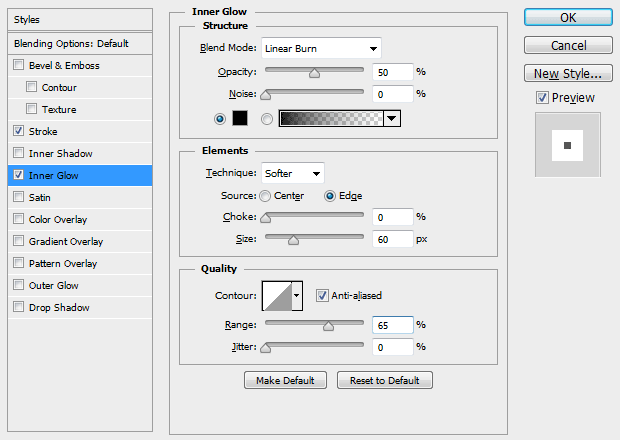
Turn the background layer back on, and then double click the layer copy to open the Layer Style dialog.
Apply the following Layer Style settings.

Step 3
Choose the Direct Selection tool (A) and click the mask to highlight it.
Click and select the top left point and move it to the right. Move the top right point to the left.

Step 4
With the Vector Mask still selected, choose the Pen tool (P). Add points to the center of the top and bottom lines, then move those points down about 25 pixels.

Step 5
Hide your working layer. Duplicate the original background layer again and press CTRL + SHIFT + ] to move it to the top in your Layers panel.
Click Layer > Vector Mask > Reveal All to give it a Vector Mask.
Select the Pen tool and make sure you have Path selected in the top menu.
Select the Vector Mask and trace around your object. You only have to be precise with the area that is sticking out of your white frame.
Hide the background layer so you can see your selection.

Step 6
Turn your frame layer back on.
Click Layer > New Fill Layer > Solid Color and use the color #EBE2DD. Move this solid color layer just beneath your white frame layer.
Select the Rectangle Tool, and make sure you have Shape selected in the top toolbar this time instead of Path.
Draw a black rectangle just beneath your white frame.

Step 7
Using the Direct Selection tool, move the top points of my black rectangle to match the size and angles of my white frame.
Using the Pen tool, add a point to the bottom line of the black shape, then move that point up to create a curved bottom.
Move all three bottom points up until the center point is just beneath the white frame.

Step 8
Right click the black shape in the Layers panel and convert it to a Smart Object.
Click Filter > Blur > Gaussian Blur and give it a blur of around 12 pixels. Set the Opacity to 50% in the Layers panel.

Final Image
You can add some texture to the background, a vignette to the canvas, and other effects to finish off the look.
Were you able to use this effect on your own image? Share your version in the comments.