How to Duplicate and Copy Smart Objects in Photoshop

Watch Video Tutorial
Download full HD videos and tutorial project files with a PanoPass. You'll also get instant access to everything on the site, including products, and more.
Working with Smart Objects in Photoshop comes with a learning curve, but there are so many benefits to it that you'll wonder how you survived before they existed.
There are two ways to clone Smart Objects and each one has different effects on your workflow.
Before We Get Started
This tutorial assumes you know the basics about Smart Objects and how to create them.
Right click a layer in your document and select "Convert to Smart Object" if you don't already have a file with Smart Objects to work with.
Method 1
This method of duplication will create identical instances of the same Smart Object. That way when you change the contents of one, each instance will be automatically updated.
Step 1
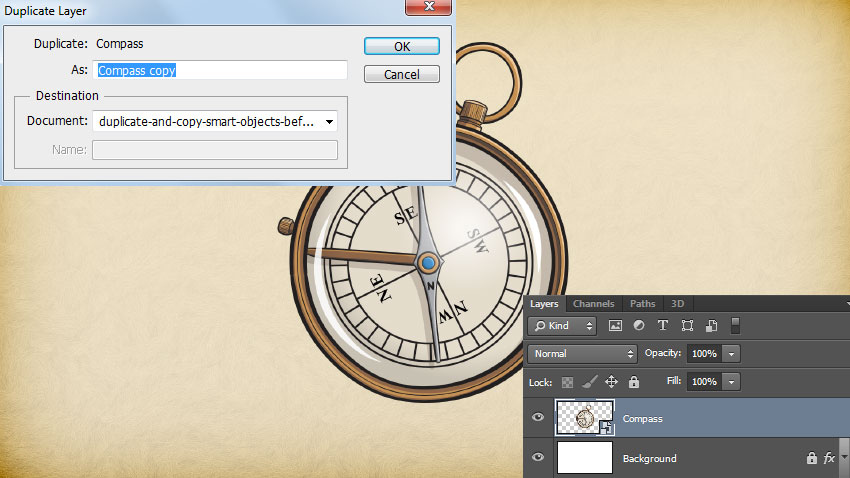
Right click your Smart Object in the Layers panel and select Duplicate Layer.
Give it a name and hit ok.
Step 2
Set the Opacity of your new Smart Object to 10% and scale it up.
Move it to the bottom corner of your canvas, then press CTRL + [ to move it beneath your original Smart Object layer.

Step 3
Double click the thumbnail of one of your Smart Objects in the Layers panel to open its contents in a new window.
Copy and paste a new piece of artwork into the new window and delete or hide the original layer.
Close and save the Smart Object window, and you'll notice that both layers have been updated simultaneously.

Method 2
This method of duplication will create new copies of the same Smart Object. That way you have to change the contents of each Smart Object separately.
Step 1
Right click your Smart Object in the Layers panel and select New Smart Object via Copy.
Give it a name and hit ok.
Step 2
Set the Opacity of your new Smart Object to 10% and scale it up.
Move it to the bottom corner of your canvas, then press CTRL + [ to move it beneath your original Smart Object layer.
Step 3
Double click the thumbnail of one of your Smart Objects in the Layers panel to open its contents in a new window.
Copy and paste a new piece of artwork into the new window and delete or hide the original layer.
Close and save the Smart Object window, and you'll notice that only one of your Smart Objects has been updated.

Learning to work with Smart Objects should be at the top of your list as a designer, and I hope this quick tip helped.
Did you know this was possible in Photoshop? Let us know more useful quick tips in the comments.