How to Install and Use Photoshop Actions

Watch Video Tutorial
Download full HD videos and tutorial project files with a PanoPass. You'll also get instant access to everything on the site, including products, and more.
Photoshop actions are one of the best ways to instantly enhance your work. It's almost like borrowing the workflow of a famous professional and using it on your own files.
This tutorial will teach you the basics of downloading, installing, and using Photoshop actions in your work.
Download some of our Photoshop actions to see the different effects you can create.
Step 1
Photoshop actions come in ATN file format (usually within a ZIP file), and like many things in Photoshop, there are a few different ways to install Photoshop actions. The method below is typically the simplest way to get going.
Open Photoshop, then toggle the Actions panel open if it isn't already by clicking Window > Actions, or by pressing ALT + F9.
Step 2
Open the folder on your computer that contains your actions, then click and drag the ATN file into your Actions panel.
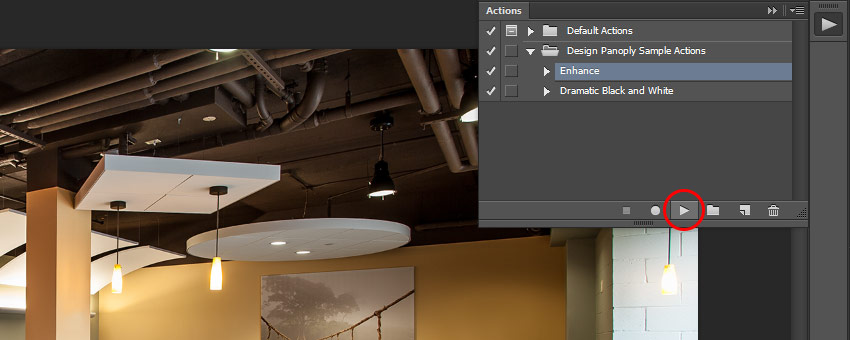
Each ATN file can have multiple actions inside. The screenshot below shows a folder named "Design Panoply Sample Actions" in the Actions panel with two individual actions inside.

Step 3
Now that your actions are loaded into Photoshop, you need to know how to use them.
Open the file you want to use an action on. A flattened photograph works best unless otherwise stated in your specific actions instructions.
Highlight the action you want to use and click the small play button at the bottom of the Actions panel.
Step 4
Some actions are just a couple steps and take less than one second to run, while others contain hundreds of effects and might take more than a minute.
Once your action has finished, you'll likely see some new layers in the Layers panel, although some actions will merge everything back into a single layer at the end.

Extra Information
You can see the individual steps within any action by clicking the small arrow next to its name in the Actions panel.
By toggling the check mark next to any specific step, you can skip specific steps when playing back the action.
If you have anything unchecked, you'll notice that the main action check mark turns red to let you know.
You can also completely delete certain steps using the trash can icon in the Actions pane or and record your own actions, but that's for another tutorial.
Make sure and visit our Photoshop actions category and grab some actions to see how far you can get with a single click of a button. Do you have any favorite actions that you use? Let us know in the comments.