How to Recover and Process an Underexposed RAW Photo in Lightroom or Photoshop

Watch Video Tutorial
Download full HD videos and tutorial project files with a PanoPass. You'll also get instant access to everything on the site, including products, and more.
RAW photo files store a lot of data in the shadows, so you can usually bring back almost any underexposed image and make it work.
Properly exposing your photos is obviously your best bet, but it's better to underexpose than overexpose. If you overexpose a photo, there's almost nothing you can do to bring back detail in the highlight areas if they're completely blown out.
This tutorial will show you the workflow to bring back lost details and create a professional looking image.
Step 1
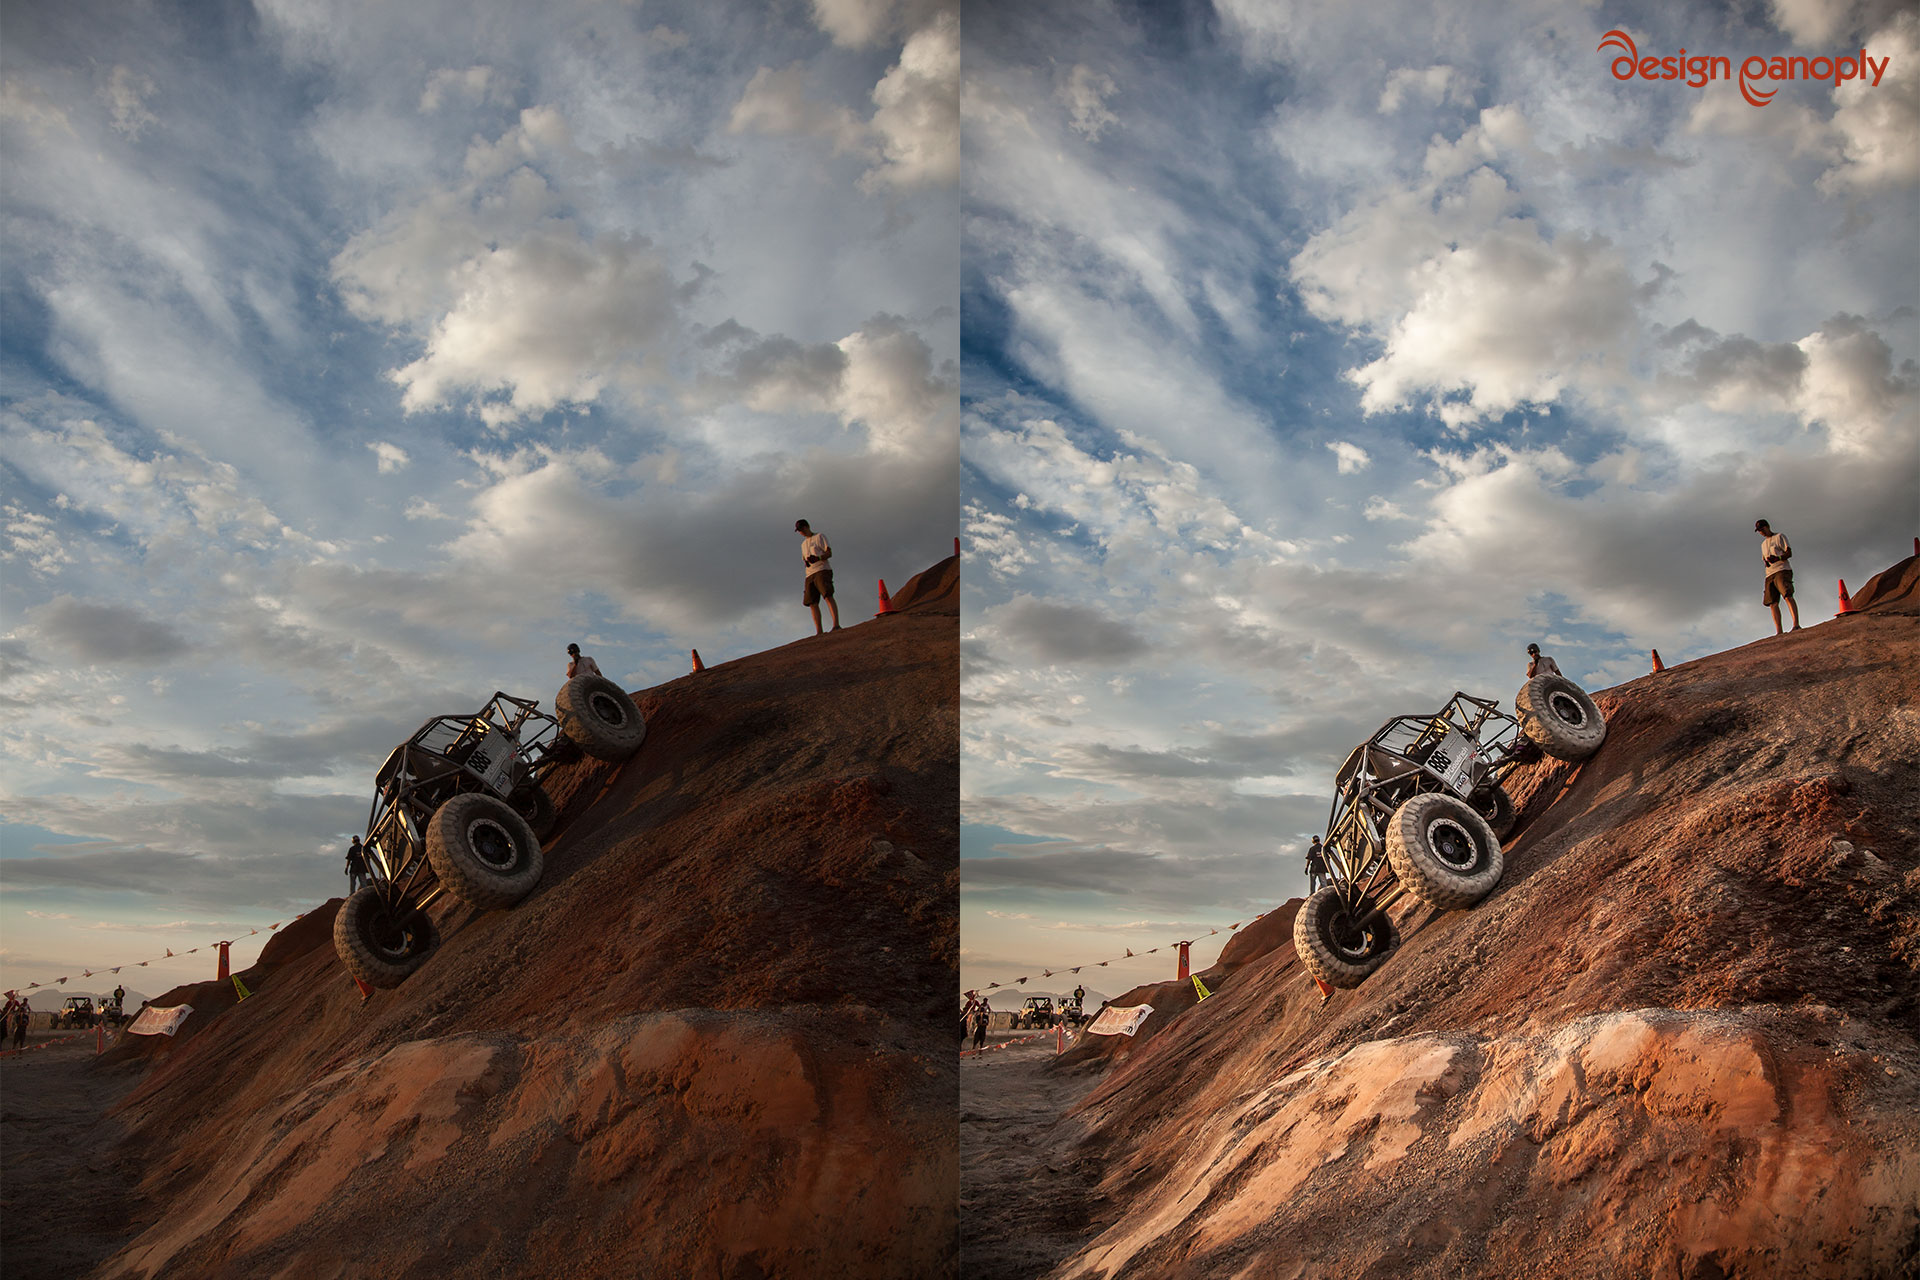
This is the image we're starting with. You'll notice that it was properly exposed for the sky, which makes the rest of the image too dark.
In this tutorial, I'll be processing the image using Adobe Camera Raw within Photoshop. You can also do the exact same thing in Lightroom.

Step 2
First, we'll make a simple Exposure adjustment of +0.50 to brighten up the entire image.

Step 3
To brighten up only the darkest areas, we'll set the Shadows to +100. On most images, a value closer to +50 is more acceptable.

Step 4
To brighten up the foreground without affecting the sky, create a Graduated Filter with the Exposure set to +0.33.
That's all we really need to do to bring back the details in our image, so now we can finish processing it like usual.

Step 5
To give this particular image more contrast, increase the Clarity to 100.

Step 6
To give a little pop to our highlights, set the Whites to 10. Increasing the Whites can make an image look brighter without making huge changes.

Step 7
Go into the Effects panel and under Post Crop Vignetting, set the Amount to -10 and the Midpoint to 40 to give the image a slight vignette.

Step 8
Latly, under the Hue/Saturation/Luminance panel, we'll make some changes to help the sky stand out even more.
Under the Saturation tab, set the Blues to +50. Under the Luminance tab, set the Blues to -25.

Final Image
With 5 minutes and a few sliders, you can quickly turn an unusable photo into something eye catching for your portfolio.
Were you able to use this method to recover a photo of your own? Do you have other helpful image recovery tips? Share yours in the comments.