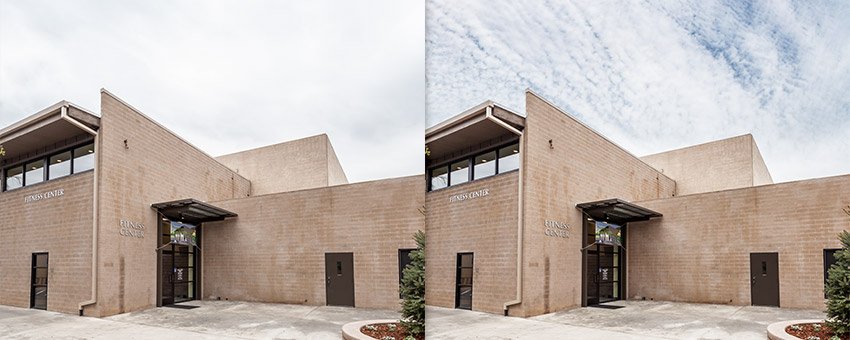
How to Replace the Sky in a Photo with Photoshop

Watch Video Tutorial
Download full HD videos and tutorial project files with a PanoPass. You'll also get instant access to everything on the site, including products, and more.
Capturing an interesting sky in your photographs can have a great effect on the overall image. What if you're taking pictures and there's simply no beautiful sky to be had?
This tutorial will teach you how to replace a boring sky in Photoshop with one that's much more interesting.
Step 1
Open your source image in Photoshop.
Drag your clouds image into your document, scale and place it at the top of the image, then hide it for now by clicking the eyeball icon next to your clouds layer in the Layers panel.

Step 2
Make sure your background layer is selected in the Layers panel and click Select > Color Range.
In the Color Range dialog, select the "add" eye dropper on the right. Make sure Localized Color Clusters is checked and the fuzziness is set around 8.
Click and drag on your sky to create a selection. You can also click and drag within the preview image in the Color Range dialog box.
Adjust the fuzziness if necessary to select the sky, while selecting as little of the rest of the image as possible, then hit OK.

Step 3
Now we need to deselect some of the extra areas that the Color Range tool selected by mistake. You can do this in quick mask mode, with the Quick Selection tool, and in a variety of other ways.
I'll show you using the Quick Selection tool.
Select the Quick Selection tool (click and hold on the Magic Wand tool) and increase the brush size to about 200 pixels.
While holding ALT, click and drag on the non-sky parts of the image to remove them from your selection.

Step 4
Zoom in to your image where the sky meets the top of the buildings.
Shrink your Quick Selection brush size down to about 10 pixels, and holding ALT, click and drag to remove any pieces of the building from your selection.
As you paint, the selection may look a bit off, but once you release the mouse button, it should clean itself up.

Step 5
Right click on your image and select Refine Edge.
Apply the following settings to smooth your selection, and shift the selection edge so it overlaps the buildings slightly. This will make for a better transition between the original image and your clouds layer.

Step 6
Up to this point, almost everything we've done was just to make a selection. Now we'll use that selection to mask our clouds.
Select your clouds layer and click the New Layer Mask button at the bottom of the Layers panel to create a Layer Mask from your selection.
Unhide your clouds layer and you'll see your clouds image has replaced the old, boring sky.

Step 7
Double click your clouds layer to open the Layer Style dialog.
Apply the following settings to fade your clouds layer in from white.
Note: With the Layer Style dialog open, you can click and drag on your image to move your gradient.

Step 8
Add a Curves Adjustment Layer and give it a slight s-curve to blend the original image in with the clouds layer a bit more seamlessly.

Final Image
The believability of this effect comes down to how accurate your selection is. Since we're using a mask, you can always go back and refine it further until you have a seamless blend between your two images.
Have you used this or a similar method to replace a boring sky before? Show us what you came up with.


