Plasma Cut Text With Shooting Sparks

Using a mixture of Photoshop layer styles and brushes, you can create a realistic and dynamic plasma cut text effect complete with shooting sparks.
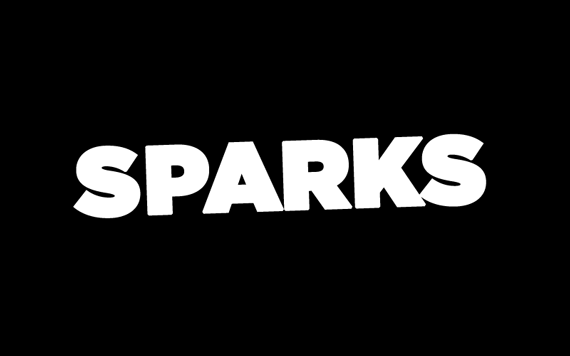
What You Will Be Making

Step 1
Create a new 800 x 600 document with a black background and place some staggered white text using a bold typeface in the middle of the canvas like the image below.
Step 2
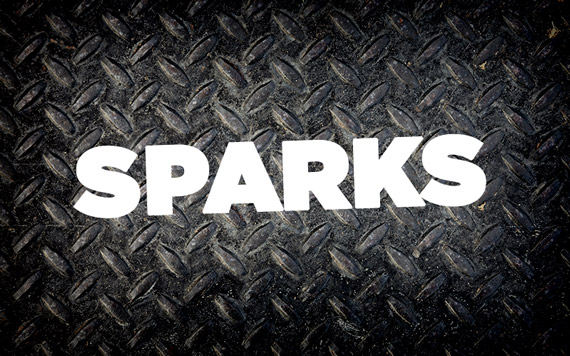
We used this diamond plate texture as our background. Place your chosen texture in your document and move it to the bottom layer.
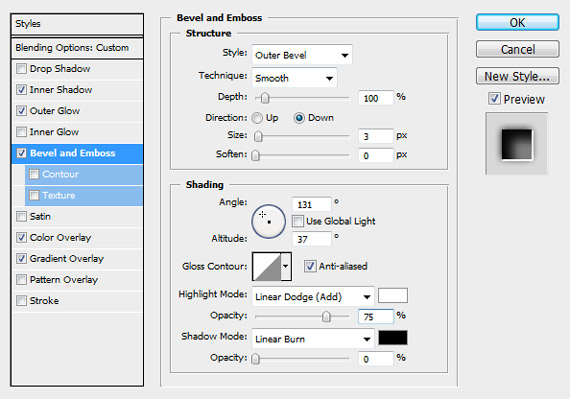
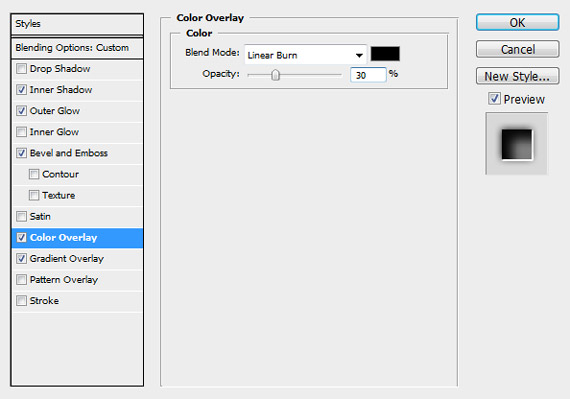
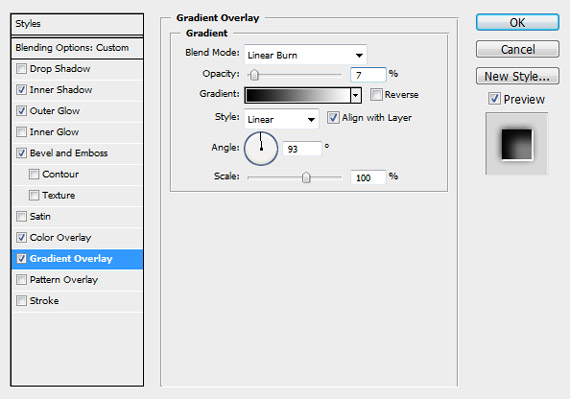
Step 3
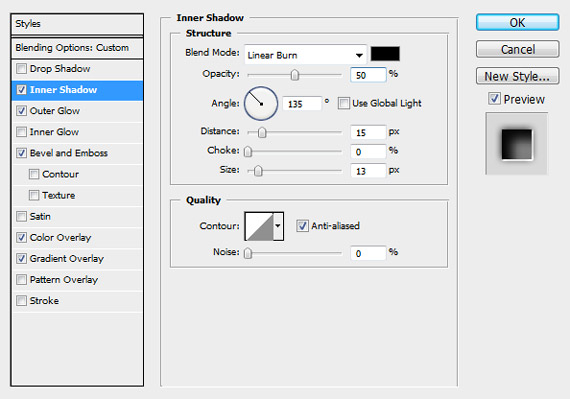
The next step is to make our text look like it's cut out of the diamond plate. Apply the following settings to the blending options of your text layer.
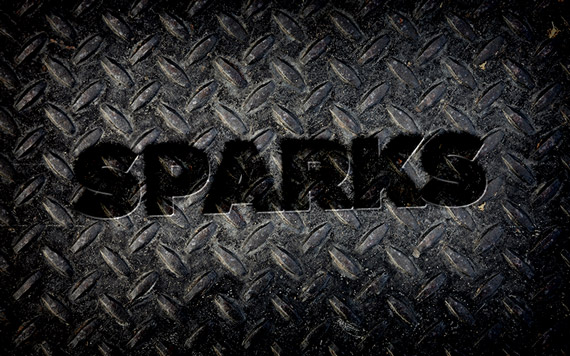
Your file should now look like the following image:
Step 4
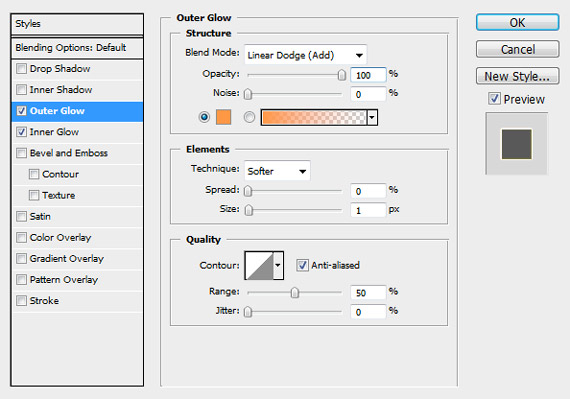
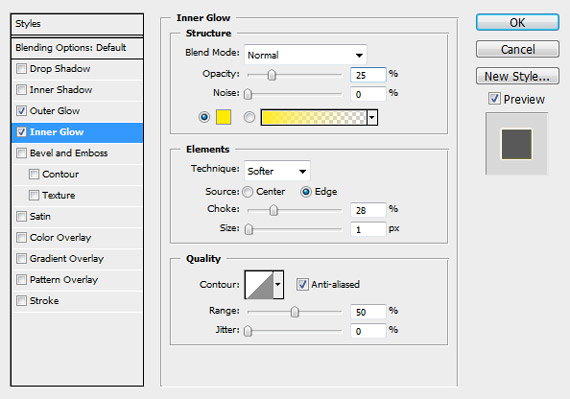
We want the edges of our text to look as if they are still glowing hot from being cut out.
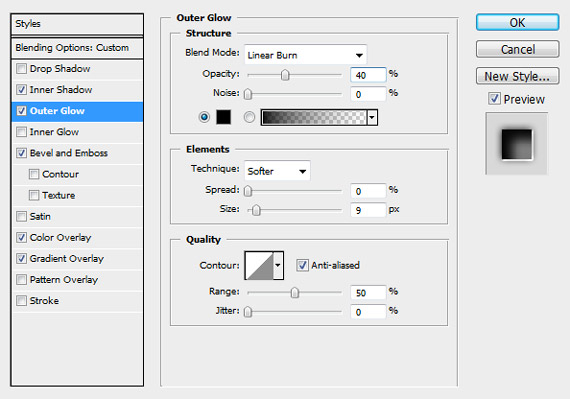
Duplicate the text layer and apply the following settings to the blending options.
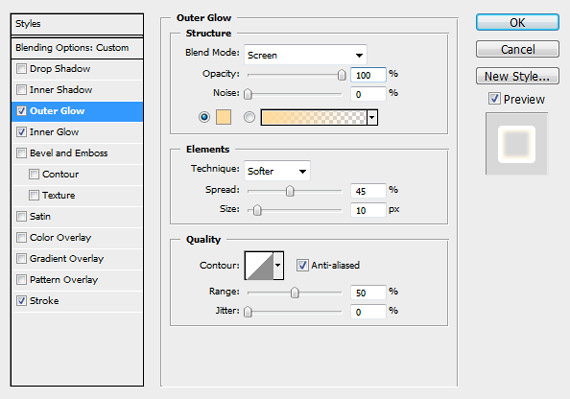
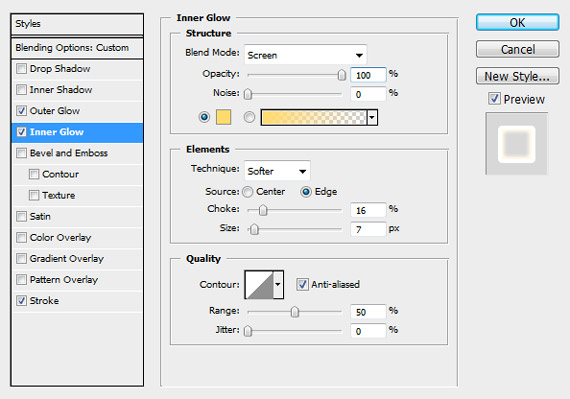
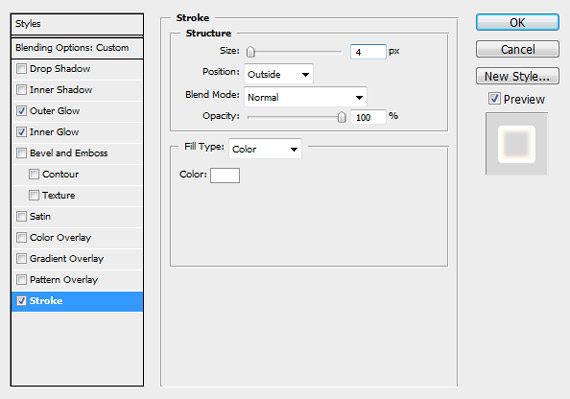
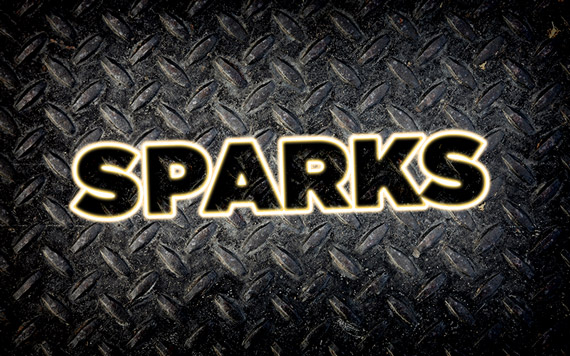
Your file should now resemble the image below:
Step 5
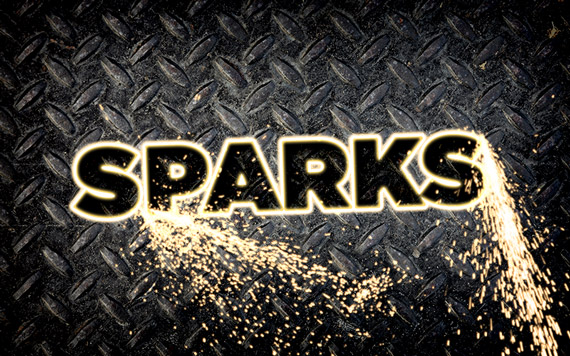
The next step requires some improvisation on your part. We used our Sparks Brush Pack to and created a couple spark trails on top of both text layers and applied the following settings to the blending options of the spark layers.
Your file will now look like sparks are spraying out from the edges of the text.
Step 6
We want the text to look as if it is in the final stages of being cut out so we will create some lens flares to originate from the base of the spark trails.
Create a new layer on top of all of the other layers and fill it with black. Click Filter > Render > Lens Flare to create the first lens flare. The settings used can be seen below.
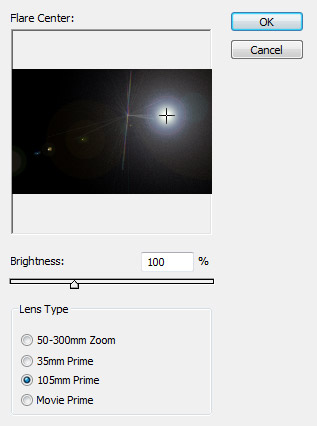
It might take a few tries to get the flare to appear in the right location.
Once you have created your lens flare, change the layer blending mode to Screen.
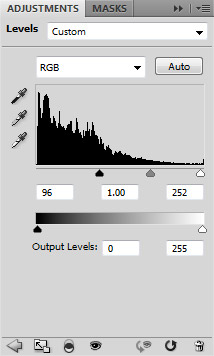
Step 7
To make the lens flare look more intense, we want to change its Levels. Click Layer > New Adjustment Layer > Levels and check the "Use Previous Layer to Create Clipping Mask" checkbox.
Use the following settings to adjust the levels of the lens flare layer. The settings used can be seen below.

Step 8
Create another lens flare using the previous steps if you so desire.

Step 9
We want to mask the glowing edges of the text to make it look like the parts that were cut out first have cooled off.
Right click the glowing edges text layer and choose Convert to Smart Object. With your new smart object selected, click Layer > Layer Mask > Reveal All. Using the brush tool and the color black, paint on the layer mask to hide parts of the glowing edges.
Your file should now resemble the following image:
Step 10
To add final lighting touches to our image, duplicate the original text layer and move it beneath all the other layers except the background.
Make sure the layer Fill percentage is set to 0% and apply the following blending options settings.

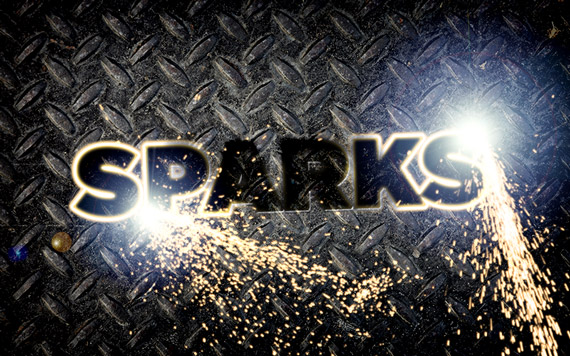
Final Image
Related Items
Grab a PanoPass now and get instant access to all these items and much more.


