Retro Linen Textured Letterpress Graphic

Retro design is everywhere. It has become so mainstream that it makes you wonder if it can even be considered retro anymore. Regardless, it is a popular style, and one you should learn.
Today we are going to show you how to create a retro linen textured letterpress graphic using Photoshop layer styles and a few texture overlays.
What We Will Be Making

Step 1
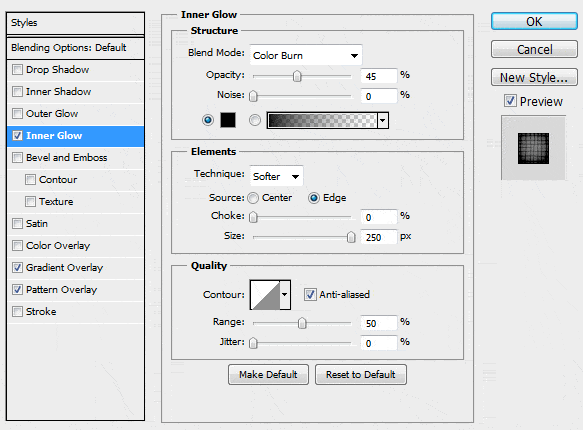
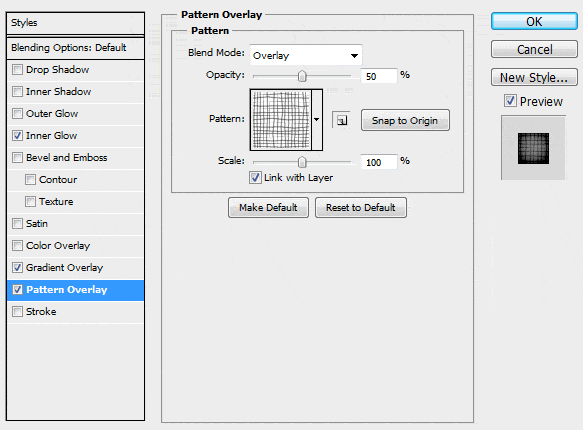
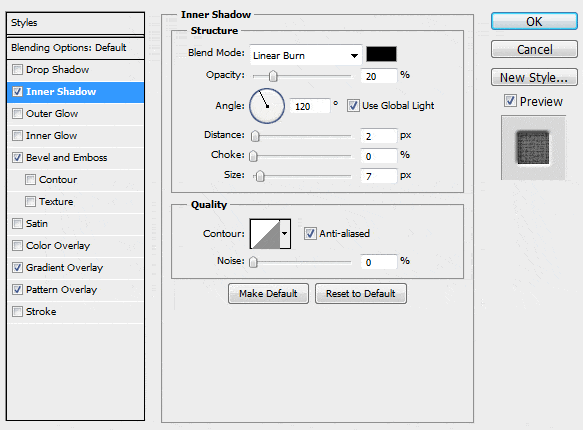
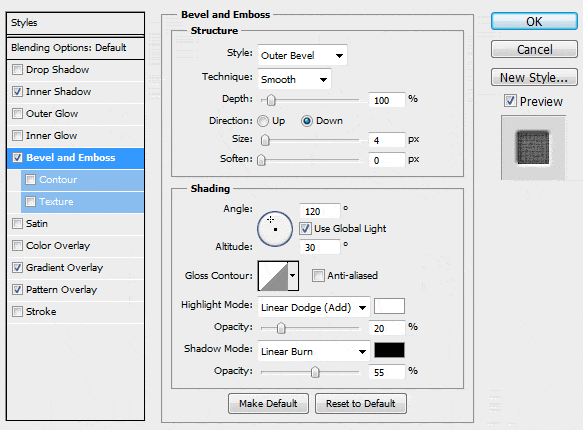
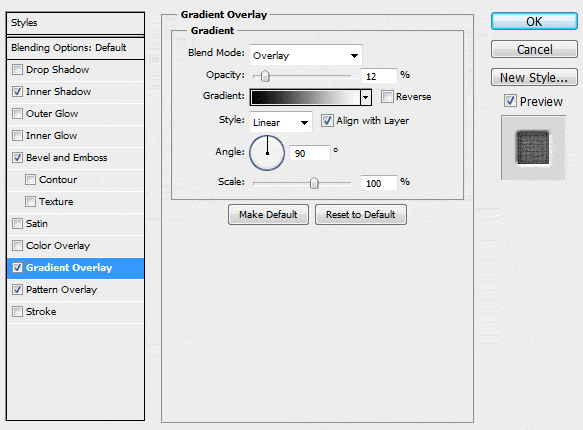
Create a new document with dimensions of 1920 x 1280 pixels and fill it with the color #C7C2B8. Double click the background layer to unlock it, then double click it again to open the Layer Styles dialog. Apply the following settings to create some texture and depth.
The Pattern Overlay we used is the "Gauze" pattern within Photoshop's Artist Surfaces pattern library.

You should end up with something similar to the image below.

Step 2
Copy a grunge texture on top and change the Blend Mode to Overlay and the Transparency to 25%. We used our Dirt Texture 003.
You should end up with something similar to the image below.

Step 3
Create a new layer and fill it with black. Click Filter > Noise > Add Noise and use the settings shown below.
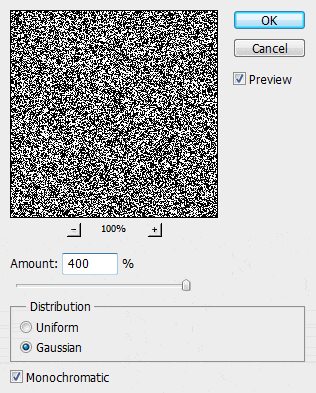
Change the Blend Mode of the layer to Overlay and the Transparency to 15% to add a some subtle texture to the image.
You should end up with something similar to the image below.

Step 4
Using the Type tool, create your title text in a large font with the color #765555. We used Lobster Font at a size of 260pt.
Apply the following Layer Style settings to your text, using the "Heavy Weave" pattern overlay within Photoshop's Artist Surfaces pattern library.

You should end up with something similar to the image below.

Step 5
Copy some vector stars that are the color #5E5D5A into your document. We use some stars from our free Vector Stars Pack. Resize and place them however you desire and apply the following Layer Style settings, again using the "Heavy Weave" pattern overlay within Photoshop's Artist Surfaces pattern library.


You should end up with something similar to the image below.

Step 6
Create a sub header using the Type tool and a condensed font. We used Gotham Condensed Bold.
With the text still selected, increase the Tracking in the Character palette to about 750.
Use the same Layer Style settings as you did for the stars. You can copy the settings by right-clicking any of the star layers and selecting "Copy Layer Style" and pasting it the same way.
You should end up with something similar to the image below.

Final Image
Show us your version in the comments below or on our Facebook page.
Related Items
Grab a PanoPass now and get instant access to all these items and much more.

