Turn Day to Night Using Photoshop

Watch Video Tutorial
Download full HD videos and tutorial project files with a PanoPass. You'll also get instant access to everything on the site, including products, and more.
A lot of people don't even realize it, but many nighttime movie shots are actually filmed in midday when the sun is shining bright. With some nifty camera settings and post production recoloring, movie studios can change the perceived time of day in almost any shot.
This tutorial will teach you how to turn a photo from day to night using nothing but Photoshop filters and adjustment layers.
Source Image
This effect works best when images have the following attributes:
- The highlights are not blown out/overexposed
- A clear separation between the sky and the foreground
- A sharp, direct light source
We're using a slightly stylized image from publicdomainarchive.com.

Step 1
Add a Hue/Saturation Adjustment Layer.
Click the icon that looks like a hand pointing with left and right arrows, then click somewhere in your sky to select the Blue color range.
Adjust the Lightness to -50 to darken the sky.

Step 2
Add a Brightness/Contrast Adjustment Layer.
Set the Brightness to -50 to darken the overall image.

Step 3
Film studios use something called color lookup tables to achieve many of their color toning effects. A color lookup table is basically an index that reads your image, and then replaces each color with an entirely new set of colors. Photoshop is not necessarily video editing software, but does include some useful color lookup features.
Add a Color Lookup Adjustment Layer.
Under the 3DLUT File dropdown, select NightFromDay.CUBE. This color lookup table will shift the typical daytime colors to a nighttime look.
Set the Opacity of the Color Lookup Adjustment Layer to 70% in the Layers panel.

Step 4
Add a Curves Adjustment Layer, and set two points as shown in the image below. This will darken the overall image even further, while giving it a slight boost in contrast.

Step 5
Our recoloring is complete, but we can add some simple special effects to create a more realistic look.
Create a new layer and fill it with black.
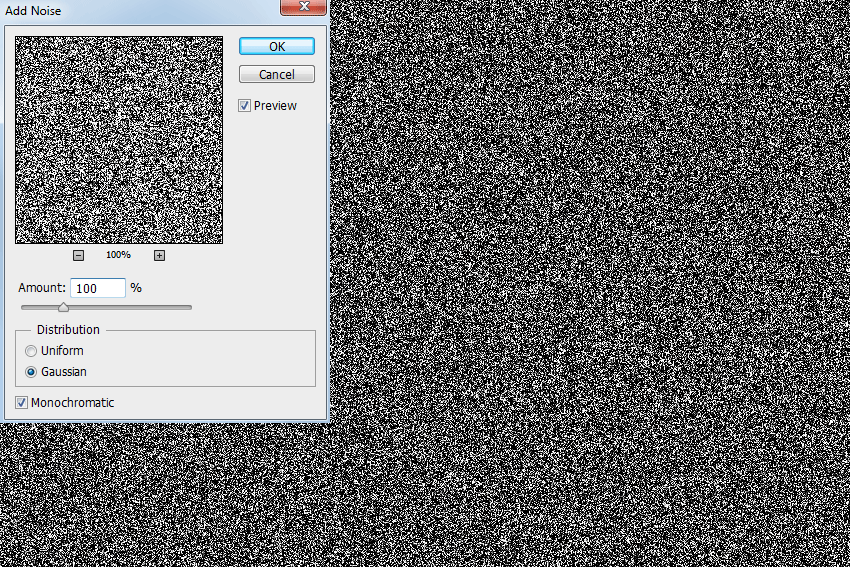
Click Filter > Noise > Add Noise. Set the amount to 100%, the distribution to Gaussian, and check the Monochromatic checkbox.
Step 6
Click Filter > Blur > Gaussian Blur and set the Radius to .25 pixels.

Step 7
Use the Quick Selection tool and click and drag in the sky to make a basic selection. ALT + click and drag to remove any foreground objects from your selection.
Add a Layer Mask, and Photoshop will automatically use your selection to mask off your noise so it only shows in the sky.
Set the Blend Mode of your noise layer to Screen in the Layers panel.

Step 8
Add a Levels Adjustment Layer and click the Make Clipping Mask button so it effects only the noise layer directly underneath.
Set the black stop to 175, the middle stop to 0.25, and leave the white stop at 255 to create some realistic stars in the sky.

Final Image
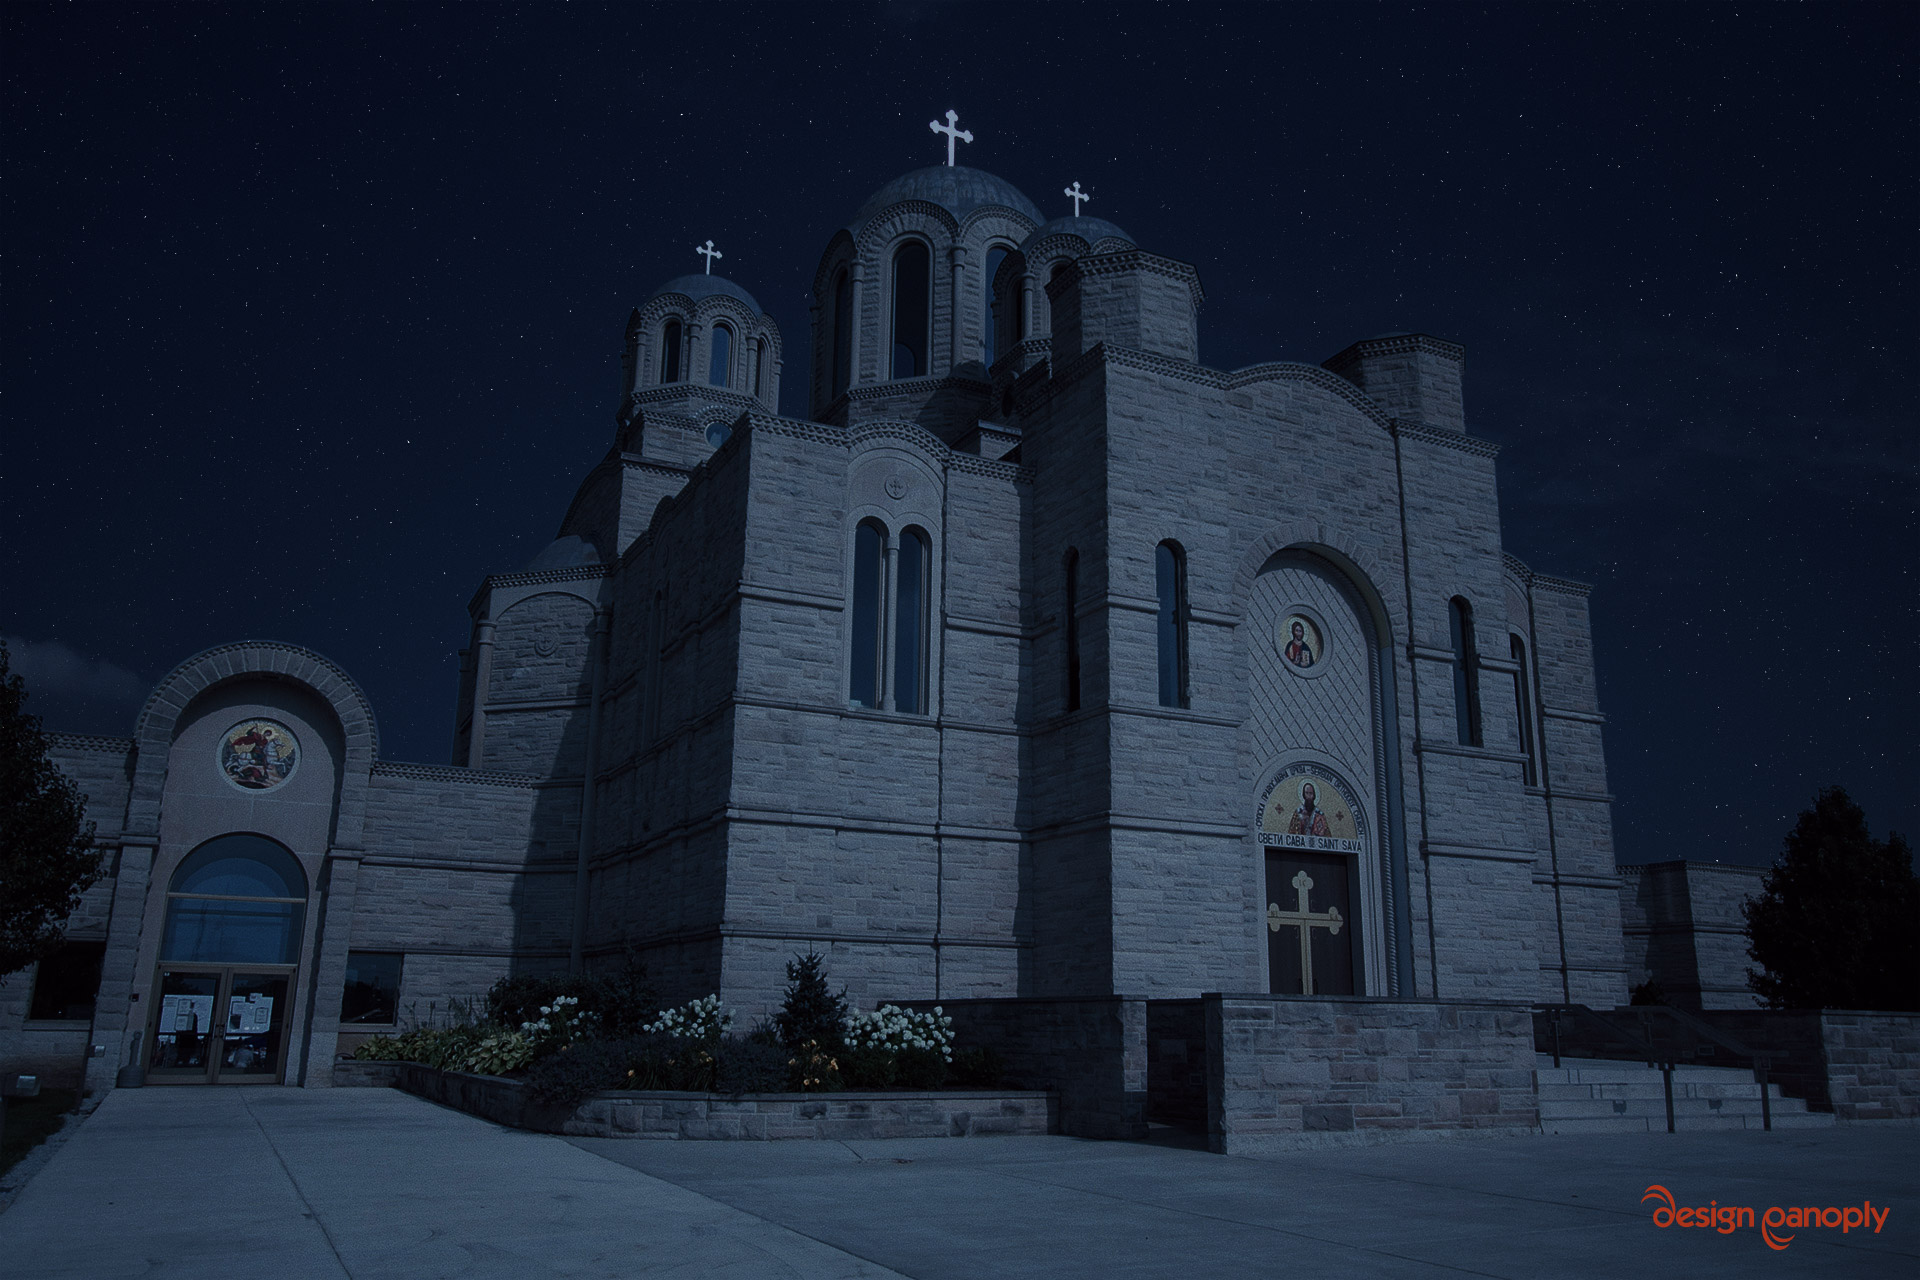
This technique can be used for many different images, but you'll have to adjust the settings for each adjustment layer for the most realistic look.
Did this method work for you? Show us what you made in the comments.