Vintage, Cross Processed Photo Effect in Photoshop

Watch Video Tutorial
Download full HD videos and tutorial project files with a PanoPass. You'll also get instant access to everything on the site, including products, and more.
The cross processed look comes from a old photography technique where you develop film in the wrong type of chemicals, which creates color shifts and changes in contrast.
This tutorial teaches you how to digitally re-create a cross processed photo effect in Photoshop.
Step 1
Open your image in Photoshop and duplicate your background layer. Name the new layer "Sharpen".
Click Filter > Other > High Pass. Adjust the Radius until you see the edges of your photo with a slight glow. For our 1,920 x 1,080 pixel image, we're going to use 10 pixels.

Step 2
Set the Blend Mode of your "Sharpen" layer to Hard Light and the Opacity to 50% in the Layers panel.

Step 3
Add a Curves Adjustment Layer.
Increase the contract by giving the overall curve a slight "s" shape.

Step 4
Select the red channel of your Curves Adjustment Layer and give it a more dramatic "s" curve.
Select the green channel and give it a very subtle "s" curve.
Select the blue channel and give it a "reverse-s" curve.

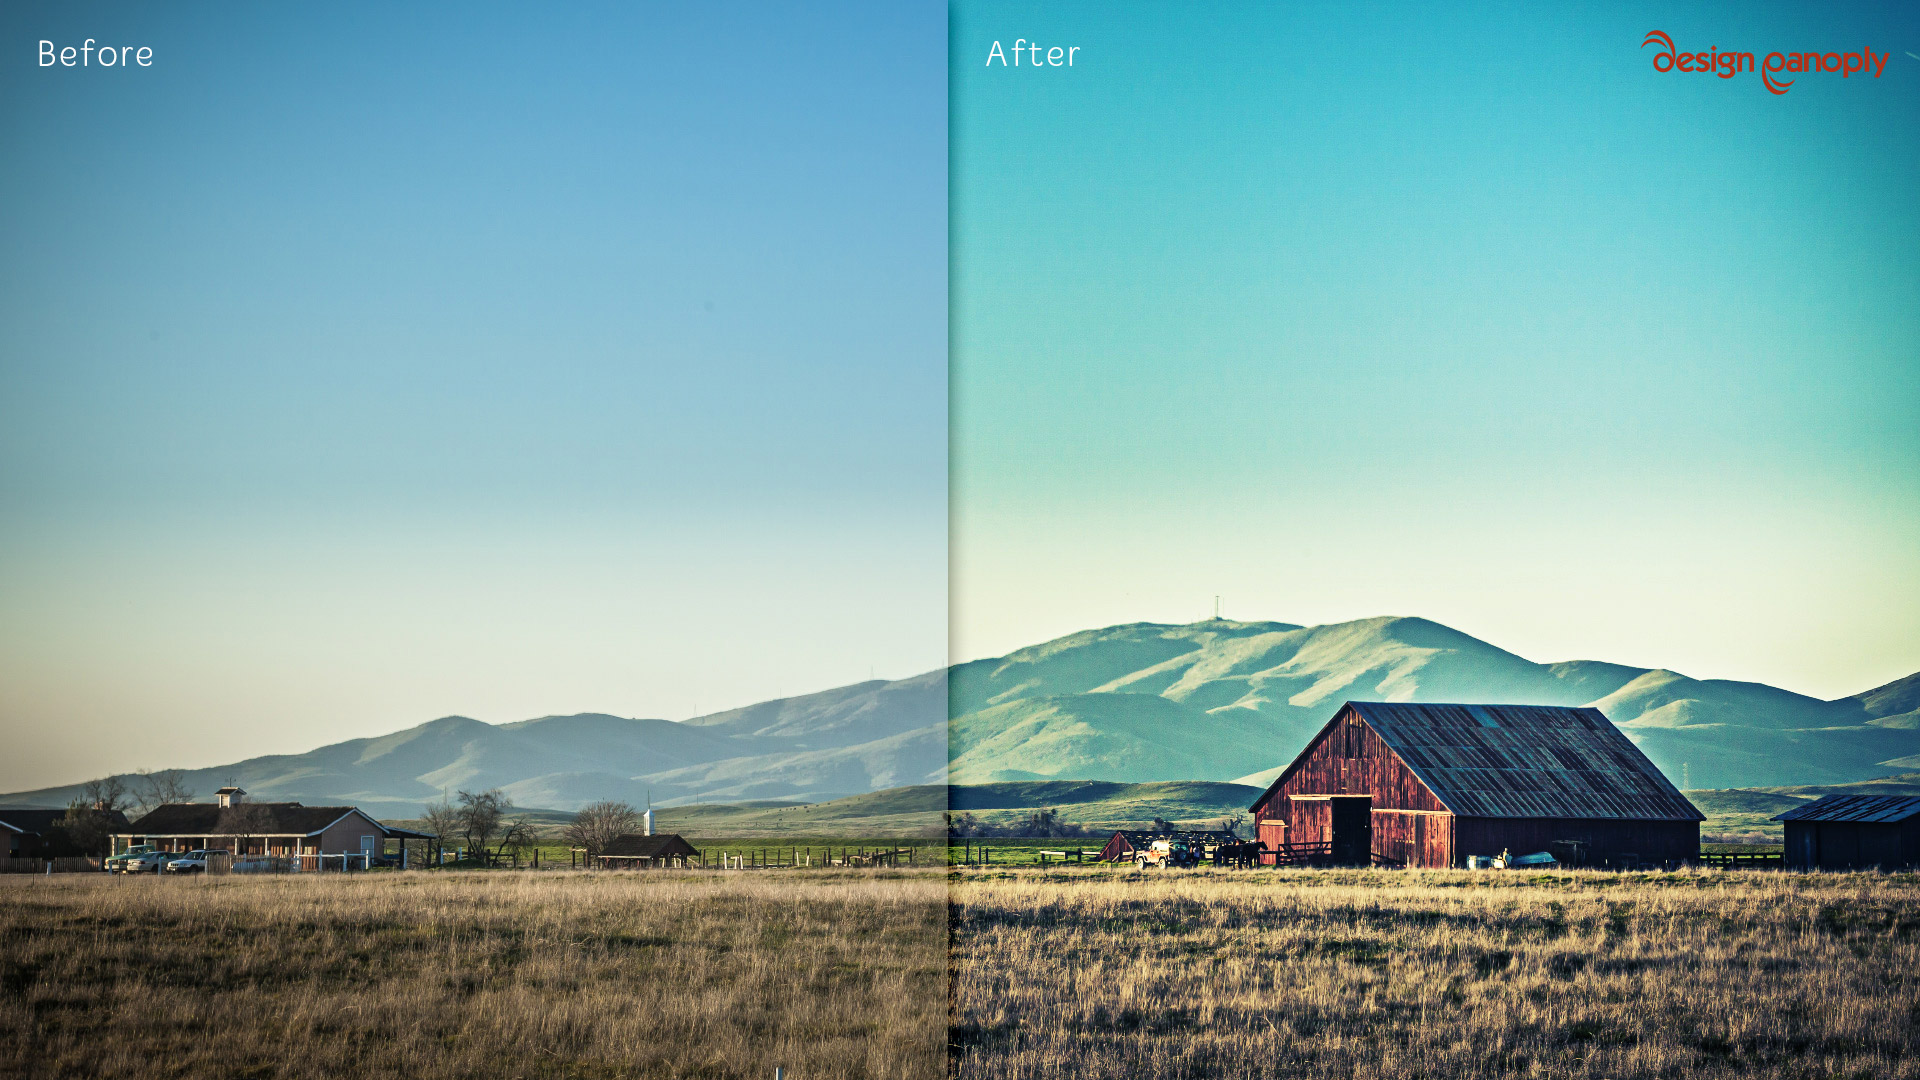
Final Image
You can go back and adjust things like the curve shapes, the layer opacity, and more to tweak the final look.
This is a super quick way to get a really popular photo effect. Show us your version in the comments.
Related Items
Grab a PanoPass now and get instant access to all these items and much more.
