Warped 3D Text Using Photoshop Repousse and Zbrush

There are a lot of new tutorials using the new 3D tools within Photoshop CS6, but what about those of you who are still using CS5?
Repousse is a quick way to create 3D geometry that can be easily exported and modified in other 3D applications, or manipulated within Photoshop itself.
This tutorial uses the Repousse feature of Adobe Photoshop CS5 Extended, and teaches you how to design a warped 3D text effect with a little help from Zbrush. Let's get started.
About The Author
This tutorial was created by Nacho Riesco of Nacho Riesco Illustration & Concept Design.
From Nacho: I am an autodidact artist who loves creating art, I started like almost everyone, using just a pencil, passing trough acrylics, watercolors, oils, etc. Airbrush was one of my most important tools for many years but now I'm fully immersed into the digital world. My favorite themes are Fantasy and Science Fiction, but in my career as illustrator I've had to do many different things.
What We Will Be Making

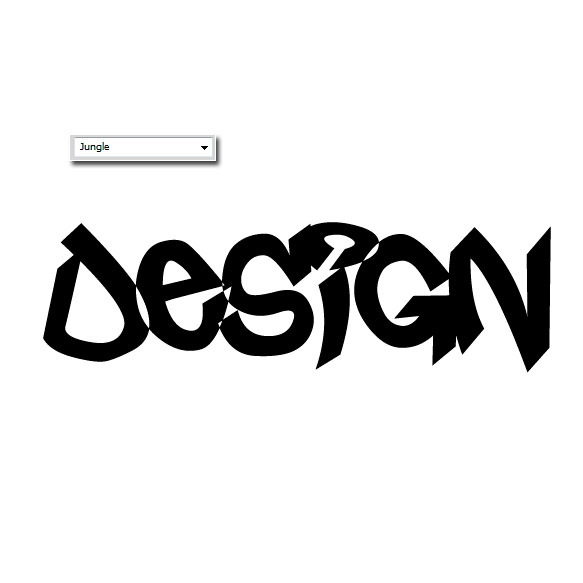
Step 1
Open a new document and create some text using the font Jungle.
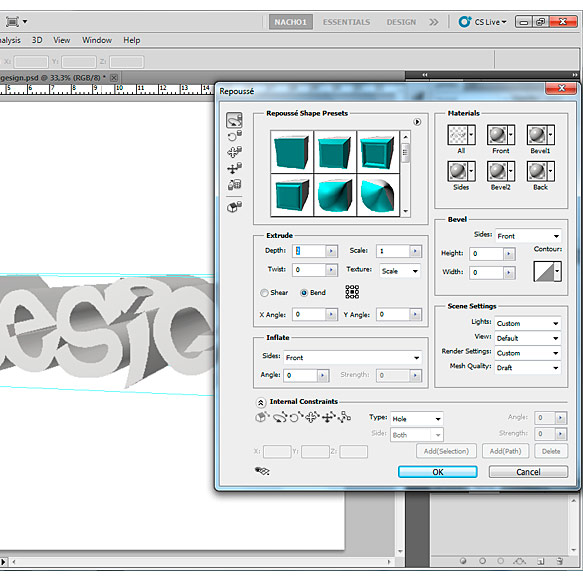
Step 2
With your text selected, click 3D > Repousse > Text Layer, and apply the following settings. The only thing we changed from the default was increasing the depth to 2.
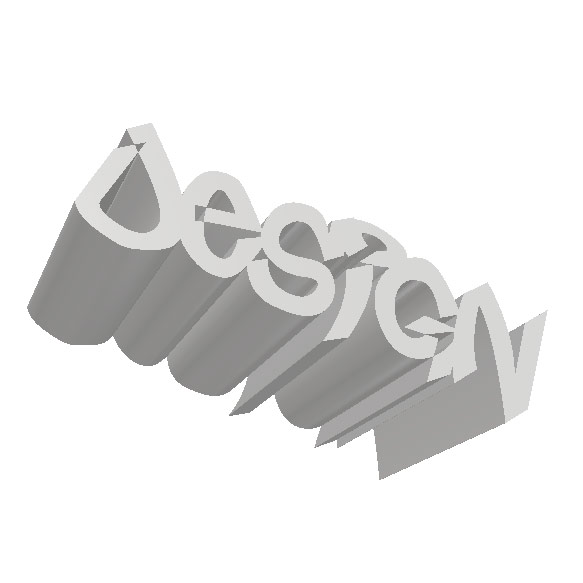
Step 3
With your 3D text selected, click 3D > Export 3D Layer, and save it as a .OBJ file using the default settings.
Step 4
Now it's time to move over to Zbrush. Although you can achieve similar effects directly within Photoshop, Zbrush offers a much easier interface and more complete deformation tools.
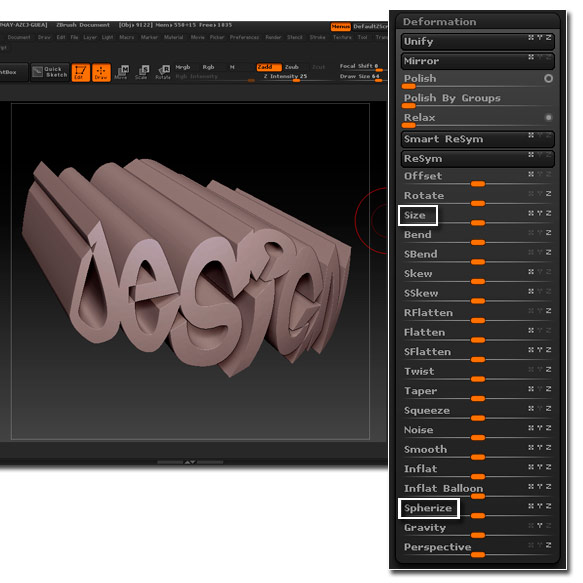
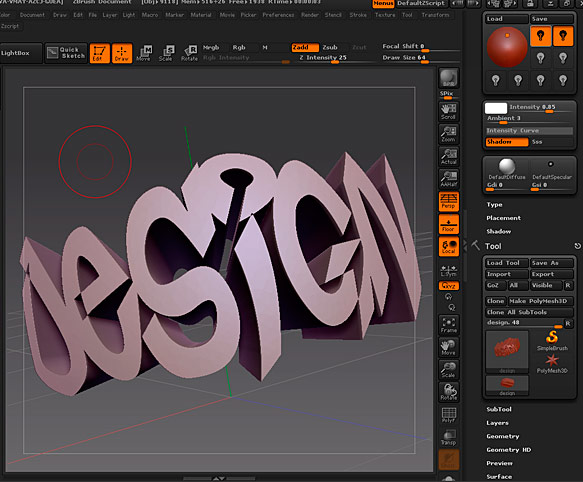
Import your .OBJ file, and within the Deformation subpalette, under the main Tool menu, start distorting the mesh by adjusting the Size and Spherize parameters until you get something similar to the image below.
Step 5
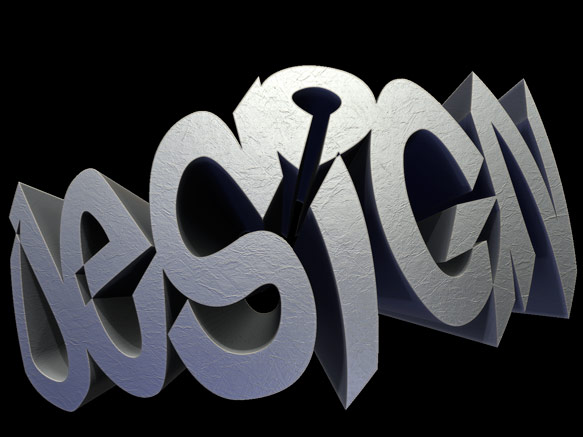
Rotate and zoom around the text until you find a suitable view for your final render.
Step 6
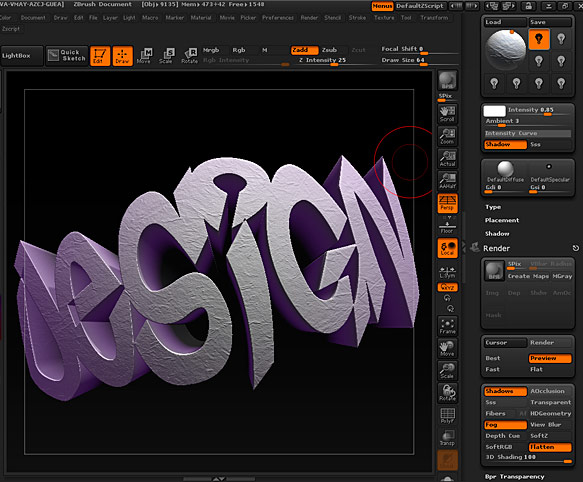
Next we will create the lighting for the scene. We used 1 white light at 0.85 intensity, and turned on Fog with a slight blue tint.
Step 7
The material for the letters was done by making some adjustments to the Basic Material.
Add this paper texture as an Alpha map to the Surface Bump Channel. Below are the settings used to ensure the texture was applied across the entire surface of our object.
You may need to adjust your material as you see fit.
You can download some free Zbrush material samples here.

Step 8
Render your object using the highest quality render settings you can.
Step 9
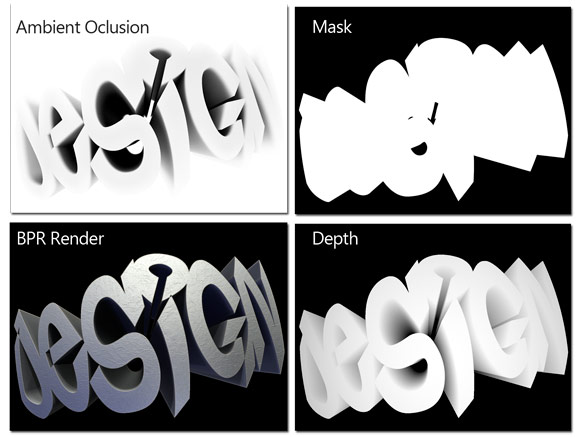
From Zbrush, we will export the following render passes: Ambient Occlusion, Mask, BPR Render, and Depth, to be used later in Photoshop.
Step 10
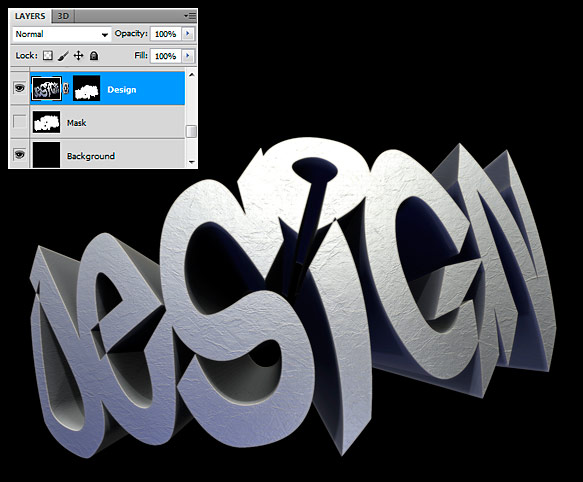
Back in Photoshop, we will start with the BPR Render pass. After opening our image, we increased the size of the canvas to allow for a little extra working room around the edges.
Open the Mask render pass and use it as a Layer Mask to isolate the 3D text from its background.
You can paste a layer into another layer's Layer Mask in a few easy steps.
- Select the layer A and copy it
- Click the Layer Mask of layer B
- Open the Channels Palette and you will see your layer mask layer on the bottom, set it active and visible, paste the contents of layer A that you copied in step 1
- Make the Layer Mask invisible again and the RGB channel visible if it isn't already
Step 11
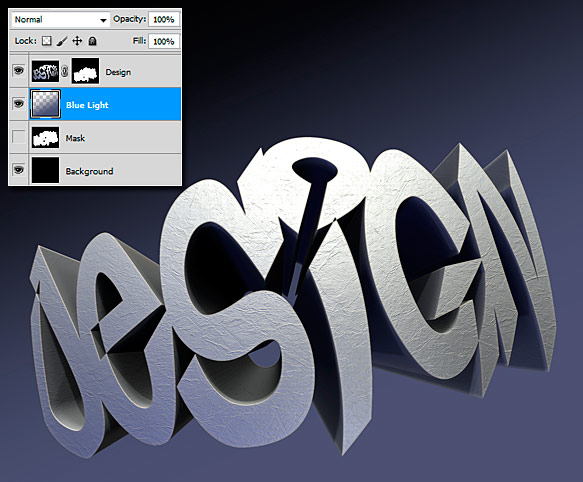
Next, create a new layer and place it below your 3D text. Add a blue to transparent gradient from the bottom right corner to the top left corner.
You should have an image similar to the one below.
Step 12
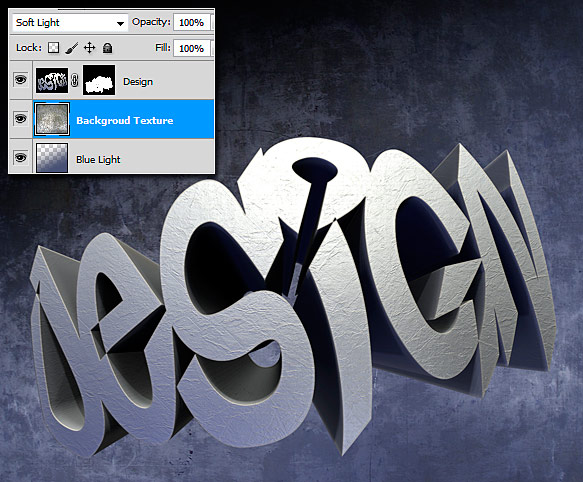
Next, place your background texture above the gradient you just created. Set the Blend Mode to Soft Light and leave the opacity at 100%.
Step 13
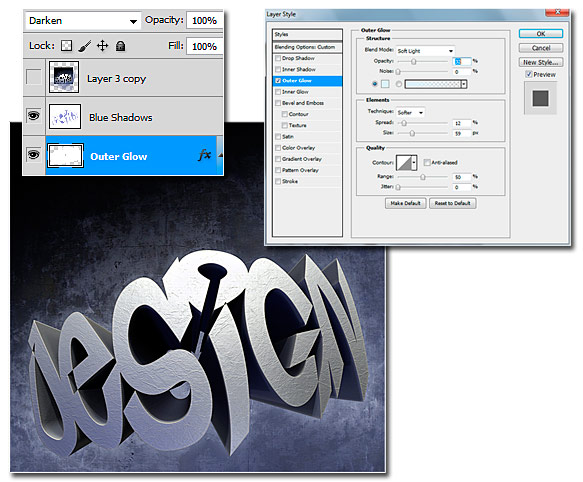
Make a selection of your text layer by holding CTRL and clicking the Layer Mask thumbnail in the Layers Palette.
Create a new layer just below your 3D text, and fill your selection with white. Press CTRL + D to clear your selection.
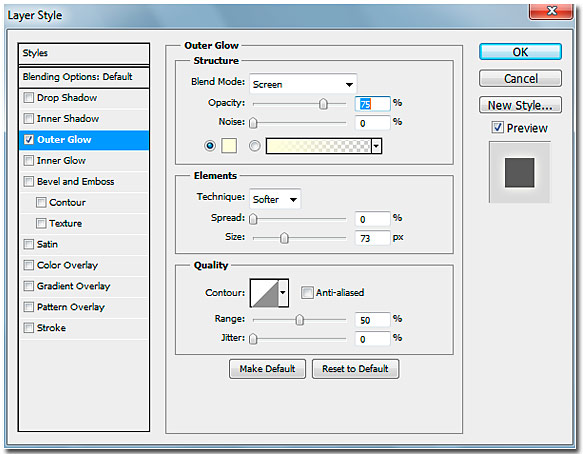
Apply the following Layer Style settings to the layer you just created to create a light blue Outer Glow. Adjust the settings until you get the look you want.
Step 14
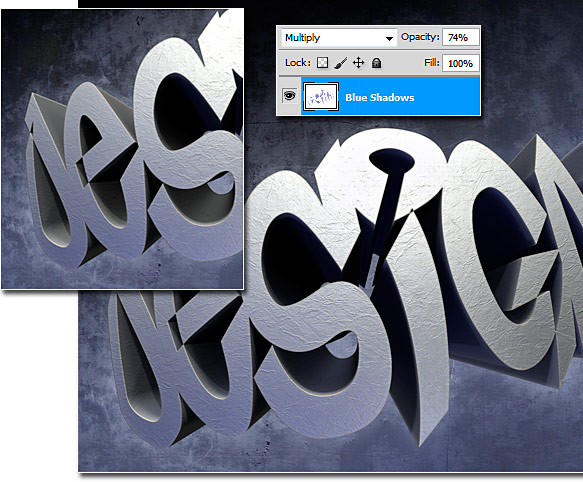
Place your Ambient Occlusion render pass above all the other layers. Set the Blend Mode to Multiply and adjust the Opacity to 74%.
We changed the color of this layer slightly by clicking Image > Adjustments > Hue/Saturation, checking the Colorize box, and adjusting the sliders until we were satisfied.
Step 15
To add a nice depth of field effect, we will use Photoshop's lens blur along with our Zbrush Depth render pass.
Open your Depth render as a new document. Press CTRL + A to select the entire canvas and CTRL + C to copy it.
Move back to your working document. Click the layer thumbnail of your main 3D text layer, and open the Channels Palette.
If there isn't already an Alpha Channel below the RGB channels, click the New channel icon to create it. Paste your Depth render as the Alpha Channel, then click the eye icon to hide it.
Move back to the Layers Palette. Select all your layers, right click them in the Layers Palette, and click Duplicate Layers. Right click them again and click Merge Layers.
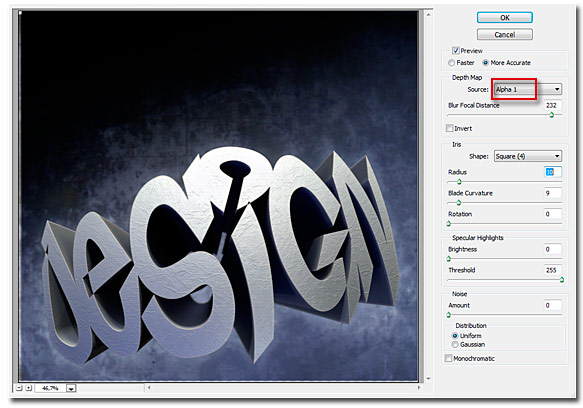
Now click Filter > Blur > Lens Blur. Select Alpha 1 as your Source, and apply the following settings. If it is blurring the wrong areas, you may need to check the Invert checkbox.
Step 16
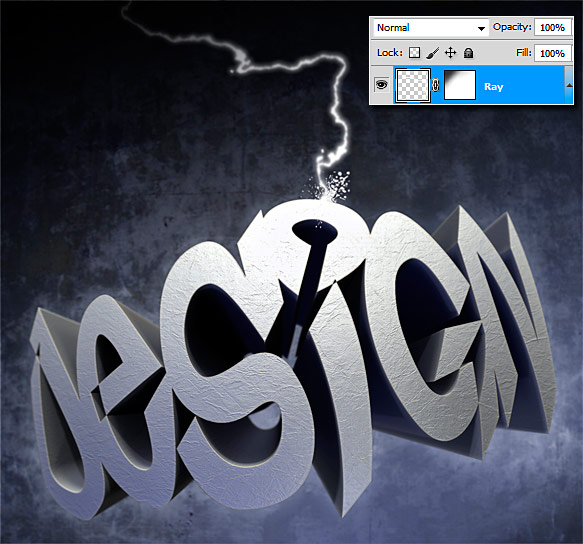
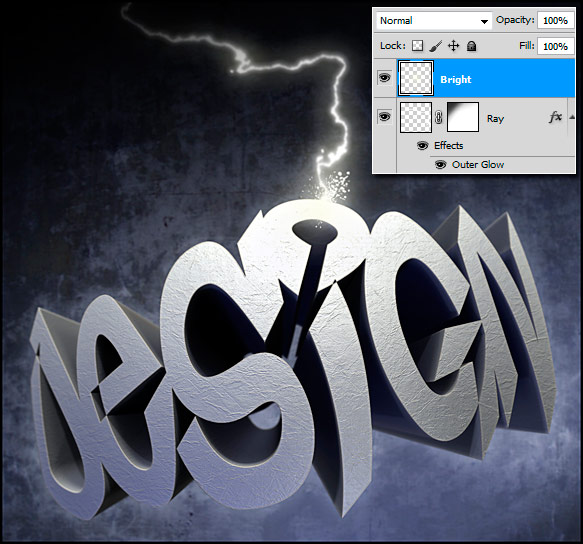
To create the lightning bolt, use one of these decorative electric brushes and paint it in using the color white.
To make it fade a bit, create a Layer Mask and add a white to black gradient towards to top-left corner.
Add some sparks in white using this grinder sparks brush pack.
Step 17
To make the sparks look like they are really glowing, apply the following Layer Style settings.
Step 18
Finally, to add one last lighting effect, create a new layer, and using a soft round brush, paint a white area over the sparks and set the opacity down to about 10%.
Final Image
About The Author
This tutorial was created by Nacho Riesco of Nacho Riesco Illustration & Concept Design.
From Nacho: I am an autodidact artist who loves creating art, I started like almost everyone, using just a pencil, passing trough acrylics, watercolors, oils, etc. Airbrush was one of my most important tools for many years but now I'm fully immersed into the digital world. My favorite themes are Fantasy and Science Fiction, but in my career as illustrator I've had to do many different things.
What did you think of this tutorial? Did you learn something new? Show us what you came up with.